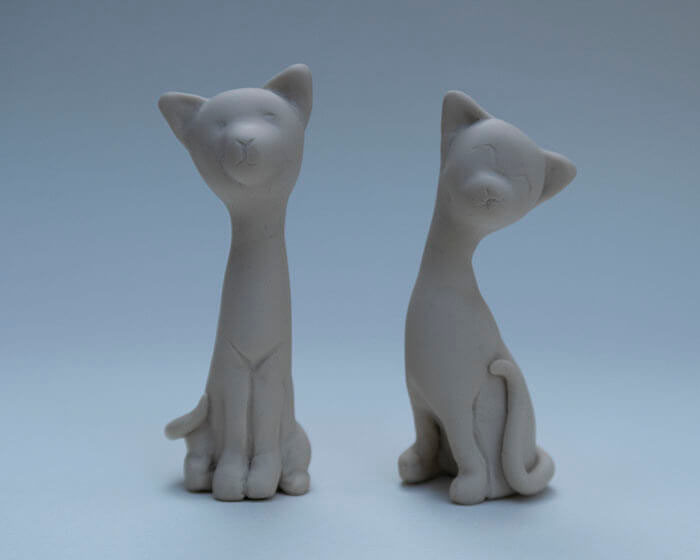
In my earlier post, 5 Valuable Things Sculpting a BJD Taught Me, I mentioned how I sculpt my dolls in both polymer and paper clay. Polymer clay is also great for making accessories for your dolls and dioramas. I will be creating some tutorials in the near future. But first, let’s talk about how to condition polymer clay.
I love encouraging other artists to work with polymer clay. But because of reformulation to make the clay less toxic, the plasticizers were removed several years ago. This makes proper conditioning of clay even more important.
Moonies are a curse of working with polymer clay. I mostly use Fimo Professional clay now for my dolls, and so moonies are less of a problem than in the past. But even with Fimo Clay, they sometimes happen if the clay is not conditioned or baked properly. And sometimes even when you condition polymer clay perfectly, they happen anyway. When making accessories, I generally use Sculpy Premo.
What are moonies, you ask? No, they’re not handing out pamphlets at the airport. Tiny bubbles that form as air pockets are called moonies in the polymer clay world. They magically appear when you bake. When you take your piece out of the oven, you might notice a lighter colored patch.
This is a moonie!
In a prominent spot, like the cheek of a doll, it ruins a beautiful sculpt. Sometimes sanding it away works. But if the bubble is large, sanding often opens up the air space and creates an ugly pockmark.
Finding the Perfect Clay
Some clays are more prone to moonies. if you ask a dozen artists what their favorite clay is, you will hear many different responses. Test several different brands yourself. That’s the best way to figure out what works for you and your oven.
I tested a lot of brands of polymer clay, but chose to work primarily with Fimo clay for dolls and Scuply Premo for accessories. Everyone’s experience differs because other factors contribute to flaws in your finished pieces. Examples are: how you condition polymer clay, oven temperature, cooling, and age of the clay can also cause moonies to appear. Even humidity increases risk of moonies. The types of clay I that caused the most trouble for me were Super Sculpey (the worst) , Sculpey III and Prosculpt. There are other artists who use these clays without any difficulty and recommend them.
Also, many of the manufacturers reformulated their polymer clay multiple times since 2008 to comply with new EU directives. This is good news and bad news. Polymer is now even less toxic, but because the plastisizers were in there for a reason, many artists are now finding that the clay is stiffer and harder to work with. If you have never worked with polymer clay before, my best advice to you is to try a few different brands and see what works best for you.
3 Ways to Condition Polymer Clay
When you open a new pack of it will often be really stiff. Even if it said soft on the package you will still need to condition polymer clay. Here are three ways that I have used to condition my clay:
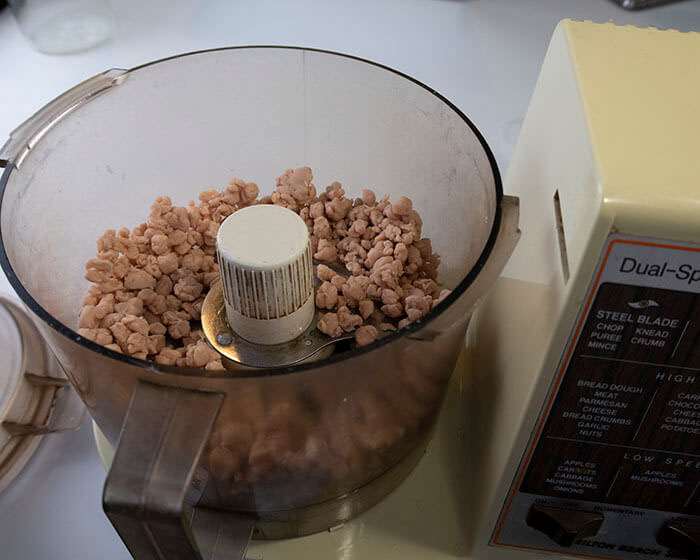
1. Food Processor and pasta machine
You need a food processor for this method that you only use for polymer clay. Check your local thrift stores. You can usually find a fairly inexpensive one. Either crumble or cut the clay into small pieces. Then pulse the food processor until the clay is softened into tiny pellets. Depending on your brand of clay, it’s age, and the method it has been stored, you might need to add a few drops of Sculpey Clay Softener.
For the second part to this method, you need a pasta machine dedicated to clay only. Use an acrylic roller to roll out the clay like you would a pie crust. Start on the thickest setting. Fold the clay in half and run through again. This is where bubbles can get trapped between the layers of clay so press out from the center before you put the clay through the roller. Change to thinner settings as you proceed. My experience with the pasta machine hasn’t been good. I usually end up with a lot of small bubbles. I only roll clay if I need a very thin sheet, or if I am making a Skinner blend. And you can’t make Skinner blends without one!
2. Hand twisting
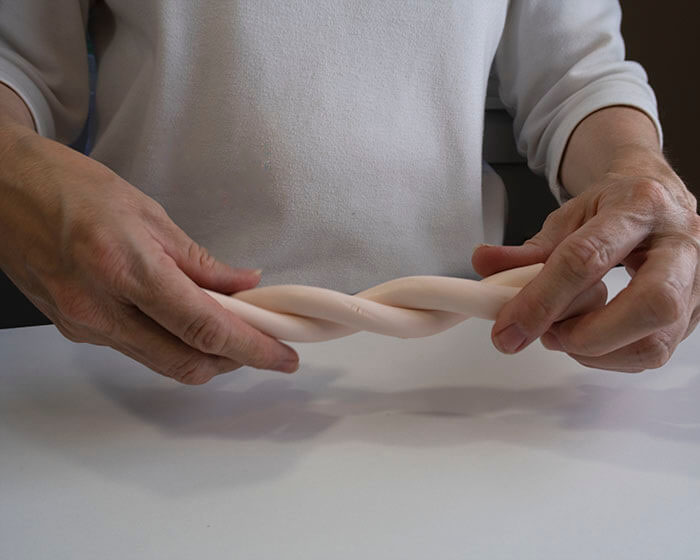
First, break off a piece of clay from the block. If you are using one of the small squares, just split off a section. Roll the clay into a long sausage shape on a clean surface. I use a special glass mat. It’s easy to clean, and has helpful measurements on it. Then bend your clay in half and begin twisting. If I’m going to add a few drops of clay softener, I do it here. Twist until there is no air space between the coils. Then roll back out into a long sausage. Repeat this over and over until the clay is workable.
I remember sitting at the kitchen table with my mom when I first started to learn to sculpt. We spent a whole morning together conditioning clay.
3. Use a press
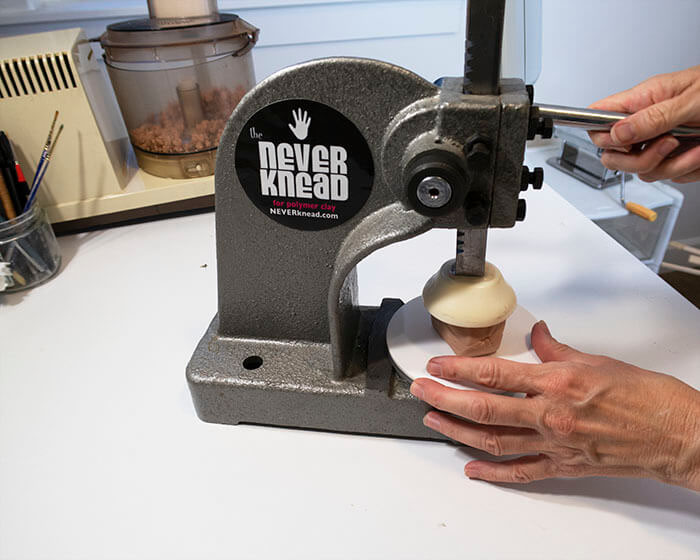
After the manufacturer of Fimo clay changed their formula, I almost gave up sculpting. The new clay is so hard that it sometimes took me hours to soften a small batch. My son even said to me, “You spend over 50% of your time kneading the clay.” When I first heard about Never Knead press, I instantly wanted it. It really does speed up clay softening because you can put a whole block of clay under the press at once. I don’t think it is as fast as the seller of these machines advertises, but it is faster than conditioning by had.
The problems I have had with this press is that oil leaks from somewhere in the machine. It’s a tiny amount. It’s hard to even see where it is coming from. I wipe the tray and the press each time, otherwise, by the time my clay is softened, there is a dark marbled pattern in it. I have found the best way to prevent this is to wrap my clay in either a baggy or plastic wrap. This keeps the clay clean, but it slows things down a lot because I have to keep pulling the plastic off and re-wrapping it each time I press it. Hopefully they have fixed this problem. I purchases one of the first ones.
Those are 3 methods I tried to condition polymer clay. They all have their pluses and minuses. I think my favorite right now is the press, because I have shoulder and neck problems.
Otherwise I would just use the twist method and make sure my hands and surface area are really clean.
How To Keep Your Clay Clean
A really important thing when you soften your polymer clay is to keep it clean. Make sure you clean your surface first. You can use organic glass cleaner on your glass mat. My room is always well dusted and I run an air filter. Also, I usually wear a white shirt and light colored pants when I sculpt. Some people wear hospital gloves, but I think it interferes with my work.
In addition, I keep my hands really clean, especially under my nails. Even then, mysterious little fibers that must be floating through the air still get into my clay. It probably doesn’t help that I have cats!
Use a magnifying glass to look for fibers, and an x-acto blade to scrape them off your unbaked clay. Once you condition polymer clay, wrap it in Glad plastic wrap until you are ready to use it.
Do’s and Don’t for Baking Polymer Clay
Not only can baking your clay properly prevent Moonies, it can keep your piece from cracking. When I was just starting, some of the advice I received from other clay artists about baking was bad advice. These are my own personal do’s and don’ts.
Don’t:
- Don’t mix brands of clay, especially if they have different baking temperatures.
- Don’t start your clay in a cold oven and then let it heat up. It is meant to be baked at a set temperature for a set amount of time. You don’t know how long the heating up phase will take.
- Don’t bake at a lower temperature for longer, or a higher temperature, thinking these methods will make your piece stronger. Baking above the recommended range can release toxic fumes, or burn your work. The clay manufacturers have tested the clay over and over. Follow the directions they give.
- Don’t harden part of the piece, like the hands or feet, before baking with a heat gun. You have no idea how hot the clay is getting. Small bits, like doll fingers, burn easily.
Do:
- If you are using your home oven, either bake inside a large dutch oven with the lid on, or wipe out the oven with vinegar before using again for food.
- Do bake the recommended time in a pre-heated oven. And check your ovens temperature with a thermometor. For example, mine is 25 degrees hot. When the timer rings, turn the oven off and open the door a tiny crack to let heat out for 5 minutes. Close door again and leave until completely cool.
- Do be very careful using a heat gun to set heat-set oil paints. You can still have moonies show up.
- Do look at your work under a magnifier before baking. It’s easier to fix something before it has baked.
- It’s okay to bake something in stages, but follow the recommended time even if you plan to bake again.
- Don’t forget to remove your work from the oven after it has cooled. Otherwise, someone might come in, put on the temperature and never think to look inside. This was a lesson learned the hard way!
Tips for removing moonies:
- If it is not too deep, sand it out.
- Try a heat gun to heat the area, and then press on the warmed clay with one of your wooden sculpting tools, squeezing the bubble out. This has never worked completely for me, but if the moonie was on an area like a cheek, I have been able to minimized the moonie until it wasn’t as noticeable anymore, and then apply blush.
One more thing I want to mention before the end is adding small bits of clay to your piece increases the risk of moonies. Try avoiding that by adding larger pieces of clay, and then shaping with your tools.
Now Get Ready to Sculpt Something!
I hope this information will help you to get your polymer clay ready to use! Stuff still happens, and moonies are a fact of polymer clay life. We aren’t firing our work to perfection in commercial ovens, so it may not turn out perfectly every time. But by following some of these suggestions you can better condition polymer clay in less time.
Comment and let me know what type of polymer clay accessories would you like see tutorials for!