As a child, two signs told me spring was here. Firstly, my grandmother’s flowering cherry trees burst into bloom. Soon her lawn would be covered in pink snow, which is the name she gave to the fallen petals.
Secondly, her tulips started to bloom in many of the same colors I painted my Easter eggs. This spring, with my state like so many others under quarantine, and strict social distancing orders from the governor, I was unable to walk through the commercial tulip fields and gardens. Instead, I ordered some tulip bulbs to plant in the fall.
Tulips, my Grandmother felt, are best enjoyed outdoors, because they don’t last long in the house. Walking through outdoor gardens, whether large formal ones, or just someone’s home garden, is something I’ve enjoyed since I was a young girl.
While I wait for the bulbs I ordered to arrive, I am starting more flower seedlings for fall bloom so that I can enjoy my own backyard garden longer.
When Social Distancing and Quarantine Didn’t Work
In my first post, Why Did I Wait so Long to Start a Blog?, I talked about caring for my mother at home. Shortly after I wrote that, her condition became worse. The last week of January, my husband took a couple of days off work to help me with her until we could move her to a nursing home. That event, pretty much turned our lives upside down for a few months.
However, at the time, Covid-19 seemed like a far off thing that would be stopped before it reached our countries’ borders. But by the end of February, her facility went on lock down. Even her dog, Barney, was not allowed in. I still take him with me when I visit twice a week. I write her letters, and bring snacks. We wave at her through the glass door. Sometimes the nurses open it a crack, but she can’t hear me.
Unfortunately, their social distancing and quarantine didn’t work. Somehow the disease found it’s way in anyway. The good news is, when I visited this past Sunday, the nurse told me they had tested her again, and she is now completely clear of the virus!
Someday, I will be able to hug my mom again, and take her dog to sit on her lap. In the meantime, I take her little bags with snacks, magazines, romance novels, and flowers.
My Village is Empty
Much of my state is still in stage 2 of the governor’s “stay at home” order.
I worry for the local shop owners. Especially because many of them reply on summer tourists. I worry for my hairstylist and dental office, who had to cancel all of their appointments for months, and are still severely restricted. And I wondered why big box stores like Target and Walmart could remain open, but not small boutiques?
We do need to protect our vulnerable populations. However, the rest of us need fresh air, to be in nature if we can, and to calm our minds, because anxiety weakens our immune systems.
Social Distancing Changed How We Work and Exercise
Most of us still need to work. Thankfully, my husband was able bring his computer, and two monitors to work from home. I love having my husband at home! Hopefully it will be a permanent thing, him working from home.
We share our small space in what is suppose to be a formal dining room. I paint, and he responds to emails, or whatever it is he does. But not everyone can work from home.
I’m lucky to live in the forest, far away from a big city. I’m so grateful the state parks opened again. I prefer to walk near my home with my dogs.
I’m an introvert. Thus, I love being at home. Social distancing is easy for me. I just don’t like being told what to do.
Viewing the Tulip Fields Online and Through the Car Window
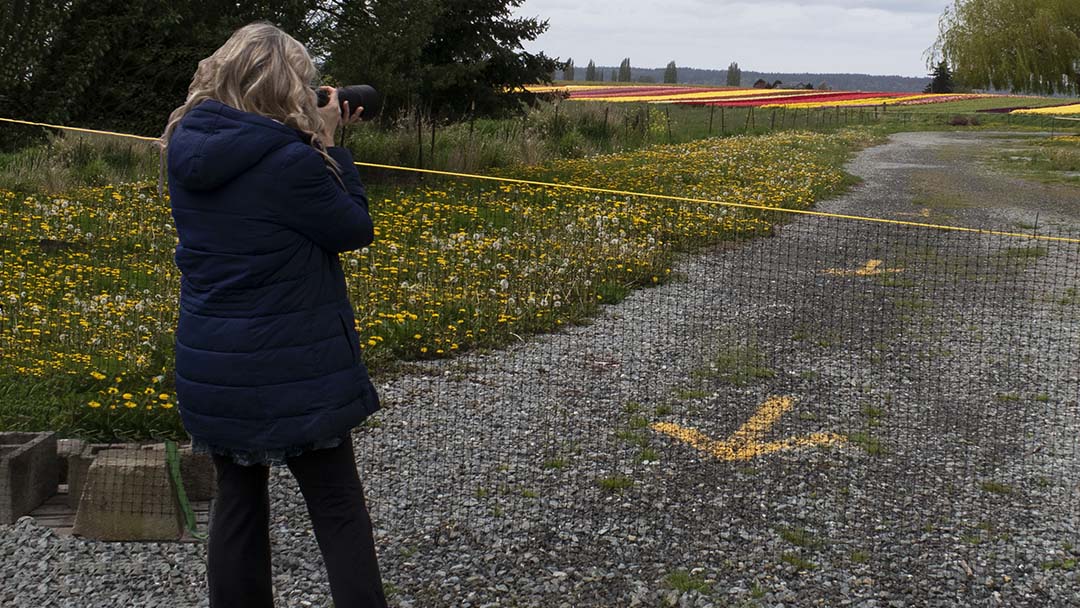
Every year for I don’t know how long, my family drives to Skagit County in Washington State to tour the tulip fields, buy bulbs, and take photos. This year, I planned to take along a couple of my BJD dolls for the photo-shoots.
However, for the first time in forever, the festival is canceled. Unfortunately, it’s not like a Comic Com that can be rescheduled. Tulips only bloom once a year.
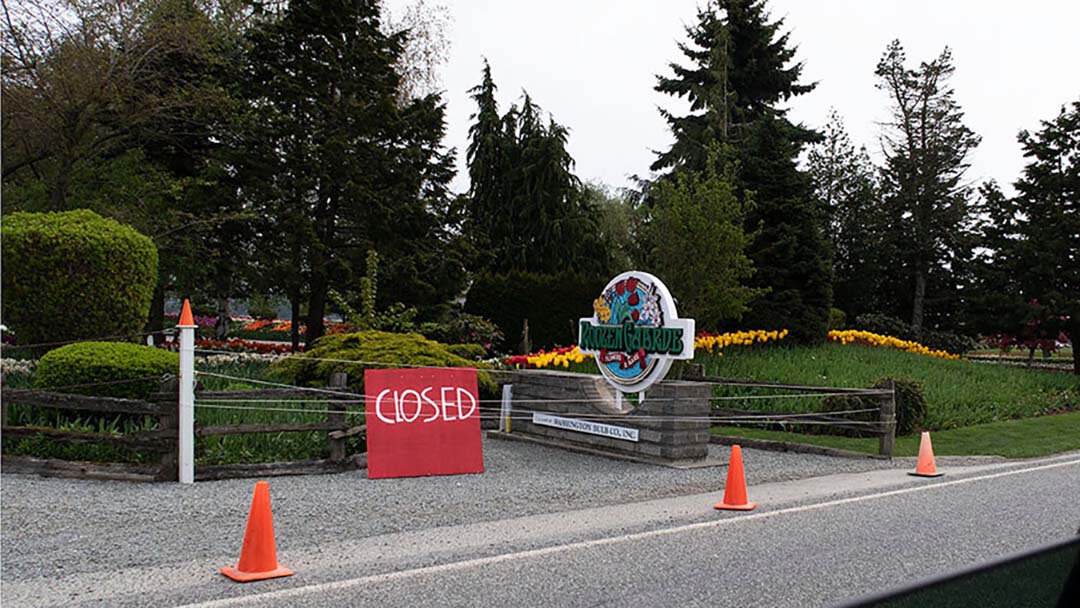
One of the main growers, Roozengaade, started growing tulips 50 ago. Although this year their gardens and fields are closed to visitors, they shared virtual tours through their Facebook page daily. On their website, they sell both cut flowers and bulbs which are shipped in the fall. We were hoping to purchase flowers there to take to my mom, however they were completely closed to the public.
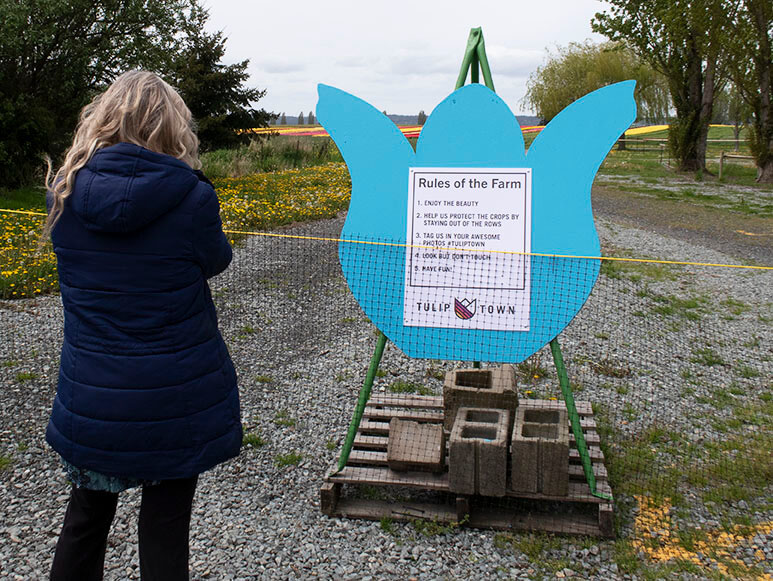
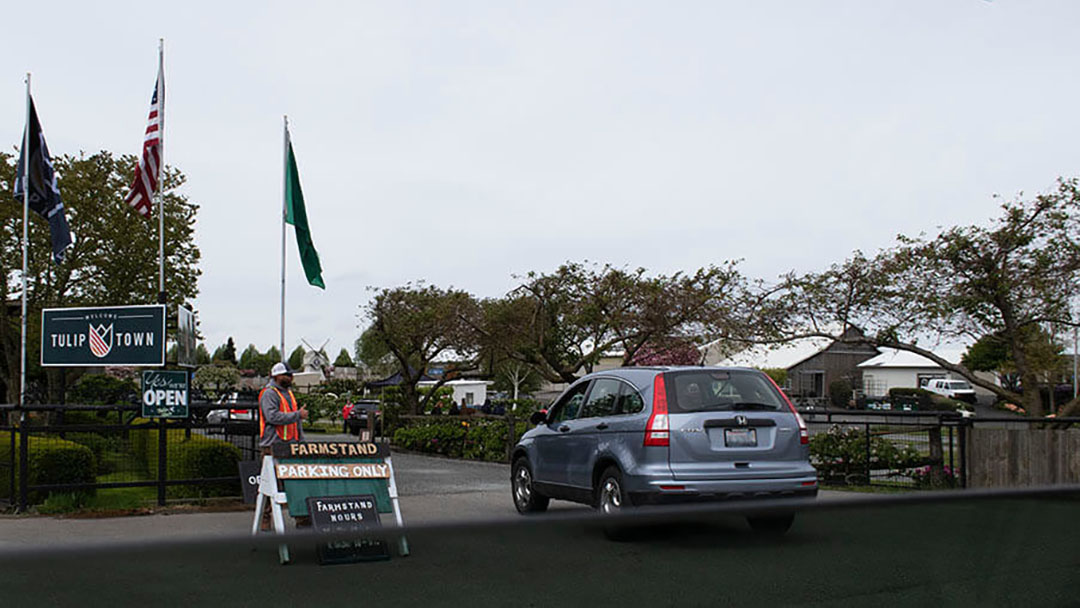
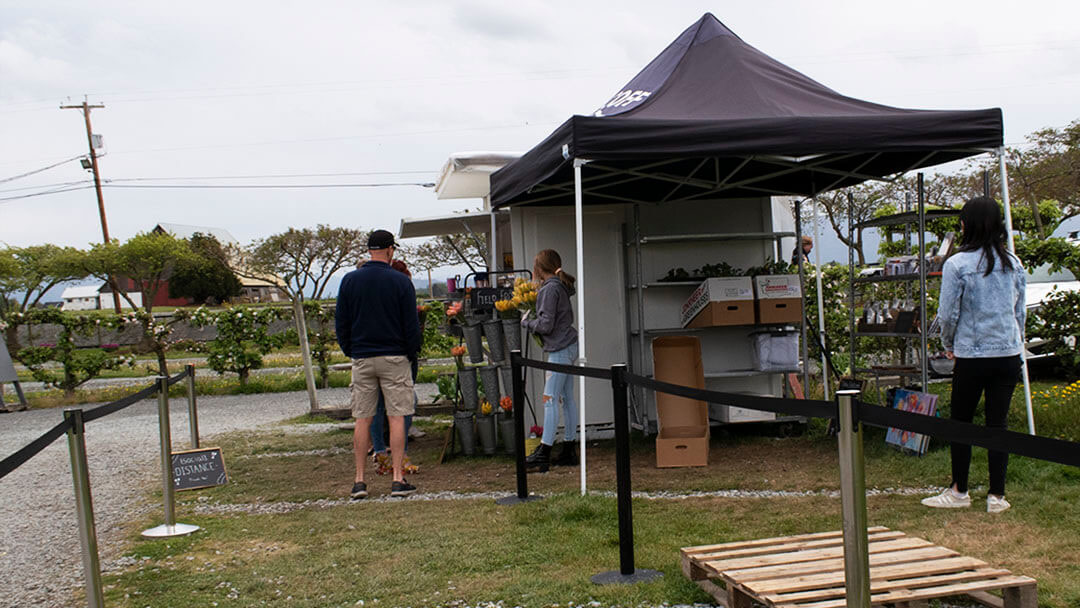
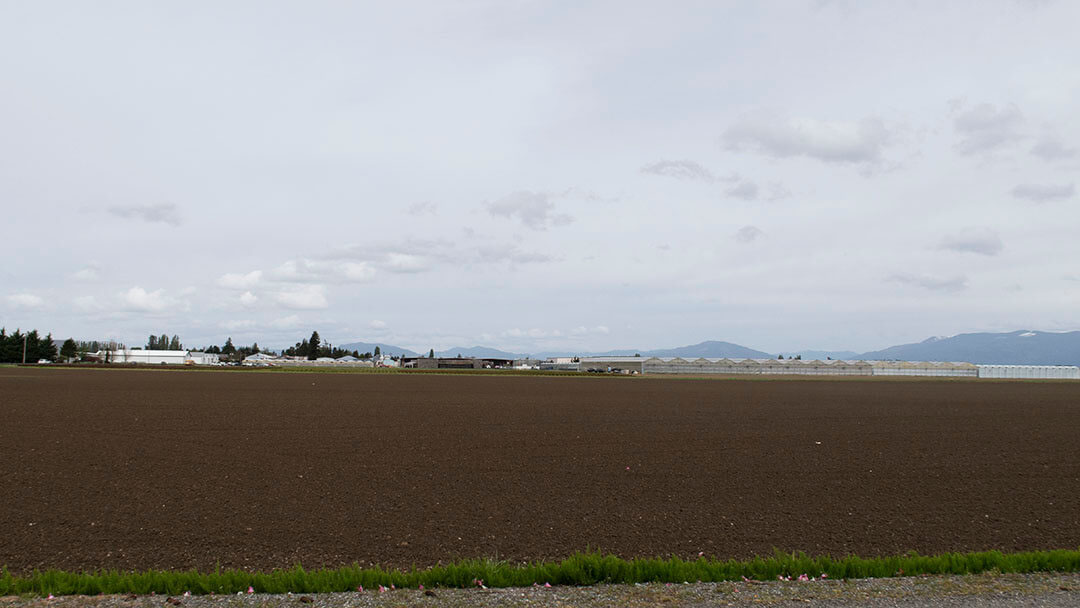
Luckily, the other large grower, TulipTown was allowing people into their parking lot to buy flowers at their small stand, and view one of the fields still in bloom from a distance. They also gave us a map of where the different fields were located, but many of the bulbs had already been harvested in early April, or the flowers headed.
If I Can’t Walk the Tulip Fields, at Least I Can Paint Them
Originally, I planned to write about my sadness for the festival’s closure, and concern for the local tulip growers. It’s what I thought about when I started my tulip painting. I reflected on the hard work of the farmers gone to waste since people will not be able to walk through the fields of flowers, or the formal gardens, or see the beauty of everything in bloom.
If you look carefully at the painting I made though, notice there are tiny people in the background touring the fields, which we will be doing next April. As the banner on the TulipTown website says, “Live to grow another year”.
One bright spot is that the growers donated many flowers to local hospitals and nursing homes.
Sad Discoveries About the Commercial Flower Industry
While researching this article, I learned something interesting. Many of the flowers we purchase throughout the year come from far away countries, produced by large-scale growers. Many flowers are not grown responsibly, either for the environment, or the conditions the workers are exposed to due to pesticides.
A large proportion of cut flowers purchased for North American weddings and funerals are grown in South American hothouses. Some of these large commercial growers spray heavily with pesticides, many of which are banned in North America because of their dangers. An example is DDT. I remember my dad used to sprinkle something called diazinon dust on everything in our garden when I was a child. I looked it up, because I know it’s banned now, and it causes all sorts of bad effects.
Some of the commercial farms are starting to use beneficial insects to cut down on the amount of toxins. Hopefully their positive actions helps the local water supplies, and benefits local bird and animal populations in the future.
Working Conditions and Exposure to Toxic Chemicals
The flower industry, especially large growing operations in 3rd world countries, generally employ low-wage workers to plant and harvest their crops. These flower growers sometimes even use child labor, and frequently they fail to pay their workers a living wage. In addition, according to Pesticide Action Network, “A study of fern and flower workers in Costa Rica found that over 50% of respondents had at least one symptom of pesticide poisoning.” And of course, with weakened immune systems from the pesticides, and being unable to have social distancing they are at even greater danger for Covid19. However, just like with clothing, you can buy fair-trade flowers.
What Else You Can Do
1. Look for flowers and house plants what are certified to be sustainably grown. Some places to find these are your local co-op market, or health food grocery. Look for the VeriFlora™ Certified Sustainably Grown label, and the U.S. Department of Agriculture (USDA) Organically Grown label.
2. Buy from local growers. It helps the environment as well as your local economy. We are just heading into the season when farmers markets are opening around the country.In addition your have a chance to talk to the growers about their farming methods.
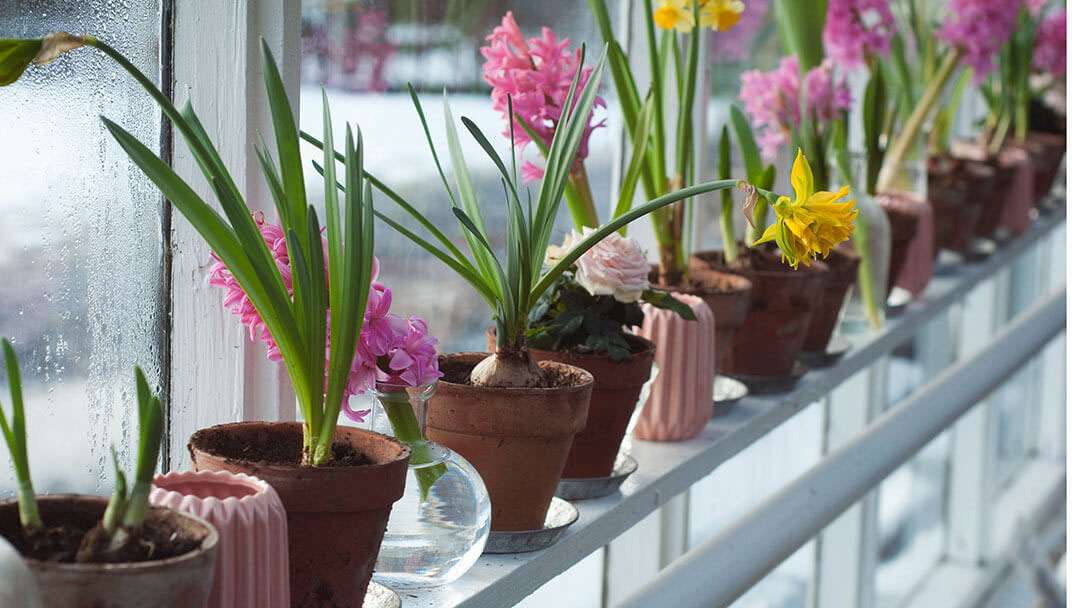
3. Plant your own flowers or bulbs. You will have bouquets throughout the summer months, and best of all, you can plant bulbs in pots, to bloom in a sunny window! During the winter months, buy flowering houseplants that are responsibly grown. Some houseplants flower for months, and with proper care, can be brought into bloom again.
4. Spend time out in your garden, even in the winter. The fresh air and sunshine helps us stay healthy. This year, for the first time, I spent at least a half hour out in my garden all winter, even on crummy weather days, because I wanted to let my chickens out, and didn’t want an owl to eat them. And this year for the first time in a long time, I was never sick, even through this was suppose to have been one of our worst flu seasons.
Plan a Cut Flower Section in Your Garden for Fall
Many of us live in an areas where the first frosts don’t happen until late October. That means that we still have over 90 germination days left for flower seeds to grow and bloom.
In September or early October, when you are out in your garden planting tulip and daffodil bulbs, you’ll be able to pick a bouquet to take into the house.
These are some of the best flower seeds to pick up at your nursery and plant this weekend. All of these have shorter growing periods and will make lovely bouquets.
Sunflowers come in so many varieties and colors. And they make beautiful bouquests on their own or mixed with other fall blooming flowers. They bloom 53 days after planting.
Asters take a bit longer, but if you plant now, you will have lovely blooms by September.
Zinnias are a favorite of mine. I love their bright colors. There bloom 60 to 70 days after planting.
Cosmos are a plant native to Mexico. There have more than 25 varieties. Their colors include pink, crimson, rose, lavender, purple, and a new chocolate shade. They all have bright yellow centers. They grow 2 to 5 feet in 83 days.
Sweet Peas just like their edible cousins, can be planted for a sweet smelling fall crop in mild climate areas. One thing I love about peas, they grow well in poor soil, and even improve the quality of it by adding their own nitrogen. Sweet peas mature in around 62 days. Many people, depending on their climate, feel peas actually do better in the fall.
Snap Dragons are a winner for fall because they can withstand some of the early frosts.
In addition planting flower seeds, you can also plant these bulbs for fall bloom: tuberous begonias, cannas, dahlias, daylilies, glades, lilies, and iris. If your spring was filled with too many rainy days to get your planting done, take heart, do it now, and go plant yourself a fall cutting garden!
Our Ancestors Instinctively Knew How to Make the Right Choices
If you want to live more sustainably, think what your ancestors would have done. My family was always out on the border lands, on the frontier, so maybe it is bred into my genes to behave responsibly, or know how to stay safe and survive. There is probably also a bit of rebellion bred in too. But I must have also inherited a love for all things beautiful.
I only have stories of my ancestors, and the challenges they faced, but I had the privilege of spending a lot of time with my grandmother as a small girl. She would have been an Edwardian Lady when she was a young woman. Her garden bloomed from early spring until late in the fall.
In her day, only the very wealthy could afford year round cut flowers in their homes. These were probably grown locally in a greenhouse. For the middle class, they waited until spring to buy from the local market, and they grew their own flowers for bouquets.
I’m sure my grandmother spent many happy hours planning additions to her small backyard garden. She was also a talented watercolor artist. She not only loved to grow beautiful flowers, she loved to paint them too.
One of the things I love best about living on an island is having an ancient and beautiful forest close by. We have so many opportunities for day hikes without the long drive. The state park on the south end of the island is one of my favorites places to walk in the woods. Until a couple of years ago, it was a camp ground too. The trees here are huge and many of them are over 500 years old.
They are magnificent!
Nature reclaims herself quickly. It’s hard to believe large RV’s once wound their way around the narrow roadways, and noisy children road their bikes along these paths. Now, it’s a ghost forest. I only occasional meet another hiker or dog walker wandering here though overgrown camp sites. The campground closed after a large windstorm what left the park unsafe for campers. The choice was whether to cut many ancient trees or close the camp area. I always side with the trees. This time, the forest service did too.
I love walking in this beautiful forest when I am trying to figure out a problem with my sculpting, or when I need inspiration for a new project. It’s my favorite place to walk and to be when I am feeling a lot of anxiety in my life.
We found the Wilbert trail by accident one winter afternoon. A recent wind storm had blown trees across the other trail we usually followed down to a secluded beach. One really lovely things is because this is a state park, dogs are allowed on their leashes. We always hate to leave our dog, Chloe, home when we are going for a hike, even though we often end up carrying her back after she gets tired out! The highlight of this trail is the ancient Western Red Cedar that saved this beautiful forest.
Back in the 70’s loggers came to the island to cut the last of the old growth trees down on the south end. But lead by a husband and wife, Mary and Meryl Wilbert, through the organization, Save the Trees, the islanders literally wrapped themselves around these ancient giants. Their actions not only saved those trees, but over 255 acres of beautiful forest that is now a state park.
You can’t get to the ancient cedar anymore because of a new threat to it. The threat of too much love and attention. The soil around the base of the tree has become compacted because so many people walked around it. Now there is a rail about 10 feet away and we have to admire it from here. There is a small bench nearby where I love to sit for a while and enjoy its peaceful energy. Like giant Sitka Spruce trees down on the southern Washington coast, these trees were already giants when Lewis and Clarke first arrived at the Pacific Ocean.
It really makes you think about longetity and how short our human life spans are. We only have a small about of time to accomplish our goals and make a difference.
Another part of this beautiful forest that I love is a boggy area where the water runs under the roots. You can hear it moving under the ground and in places it bubbles up in small streams and pools.
One of the cedars has a root that curls out in front of it making the perfect spot to sit and listen to the water moving beneath. Another is almost as large as the Wilbert tree, but about 15 feet off the ground, it splits and a large branch comes off the side of it. It took me a while to realize that it wasn’t a branch at all but a Doulas Fir tree living symbiotically off of the Cedar. The Western Red Cedar leans in the one direction and the Doug Fir to the other. I suspect it is the weight of this fir tree that keeps them both from toppling over. I love to stop on this part of the trail, lean my back against them, and feel the energy of these ancient giants flow into my heart.
On a walk with my son recently, he told me about how he had learned in school that scientists have detected that trees have a measurable heartbeat. It turns out trees have a heartbeat too. At night they move their branches up and down like a pump in slow cycles the scientists have only just discovered. It corresponds with the uptake of water moving toward the top of the tree through the trees veins which are called tracheids.
Deep in this beautiful forest, these are my favorite trees.
The last photo above is the Norwegian Spruce that my father planted the first Christmas in our new house. When my mom finally had to sell our family home, her next door neighbors decided to sue her because we (well, me actually) had refused to cut it down for years. It was ruining their plan to pave a wide asphalt driveway all the way to her property line. I couldn’t watch the day that tree was cut down, and I never wanted to drive by the house again. That was a battle I lost. But it doesn’t mean that I won’t go to war for the Ents again. Some people even believe the trees are waking up.
This last Christmas we planted a new Norwegian Spurce in our yard. One that will never be cut down by nasty neighbors. And along with the Redwoods I’ve planted here, someday this will be an ancient and beautiful forest.
So I challenge you, what do you care about passionately? What would you do if you knew that your one small voice or action could make a difference? Be like the islanders who saved a beautiful forest. We don’t win all of our battles. But if we don’t even try, we’ve already lost. Arbor Day is on this coming Friday. Go hug a tree!
The other day I was out walking in the woods, and thinking about about the conversation in a Facebook group I belong to some time ago. In particular someone had said, “Why paint a tree when you can grow a tree?” I don’t know. Maybe ask Monet.
Monet’s poplar series of paintings was so inspiring to me in college. There was a row of tall poplars along a pathway that overlooked a lake on my campus. I could see them out the huge windows of one of the fine art classrooms.
I loved those trees.
I used to have little picnics under them with my boyfriend. I think great painters are capturing a bit of magic. A moment in time. If it wasn’t for Monet, I might never have noticed that row of tall trees that ran along the ridge overlooking the lake. I might not have spent hours walking there. Sometimes I pretended that I was walking on the moors in England and sometimes the gardens of France. (Obviously, I wasn’t a math major.) That place still feels magical to me. Because of Monet, I discovered it.
Have you ever had a dream to start a hobby or try something new? And then someone came along and said to you, “Why would you want to do this? Or, “That’s just a waste of your time!” Maybe you wanted to learn to play the guitar, but your parents thought that you should be studying. Or you wanted to write poetry instead of essays. And so the dreams got put on hold.
It’s never too late to restart your dreams. It’s never to late to try something new just because you didn’t learn it as a child. There is a dance school where I live that started an adult ballet class and it has become one of their most popular classes.
One of my dreams is not only to learn to paint in the traditional style someday, and to learn how the old masters created their pigments from what they found in nature (I know, some of this stuff is very toxic. I will be careful), but also to travel to as many museums in Europe and the East Coast to see their work while I still can.
Many of you remember the images of the looting of the museum of ancient artifacts while the Iraq war was going on, and while the troops were defending the oil fields. It was heartbreaking. We always assume that these treasures will always be there, but history tells us otherwise. So if there is an exhibit touring in your city, try not to miss it. It might be the last chance to see that work forever.
In the 70’s there was a tour of the treasures of King Tut’s tomb. My uncle had been fascinated by Egyptology his whole life, so he and my aunt went to see it. My parents decided the drive to Seattle was too far, or maybe they just weren’t that interested. A few years ago, there was another tour of some of Tut’s treasures. This was hailed as the last time any of the treasures are allowed to be exhibited outside of Egypt. It was a limited show compared to the first one. But I made sure that I didn’t miss it and took my son. If I never make it to Egypt, at least I saw a few of the items found in his tomb in person! If you were lucky enough to like in New York, Paris, or London, the treasures did make one last tour. Now, I can only hope to visit Egypt one day.
I know a lot of people don’t like to go to museums. They find them stuffy. And I don’t pretend to like modern art much. If you want to nail your painting to a wall with a big spike, go ahead. I’m talking to you, Neo-Dada.
We are all inspired by different things. But I feel like the classical artists had a connection with nature that we have lost in the last century when most people in the world have taken to urban living. Studying these artists works reconnects us again. It might inspire you to take a walk outside at lunchtime instead of sitting in a windowless lunchroom. Or taking a day trip on the weekend and going for a hike.
For me, connecting to nature went way beyond that and I now live in a forest. I often take long walks in an ancient wood or along a nearby beach. Those places inspire my own artwork. And I can trace it all back to studying so many of the classical artists in college.
What I learned from Monet is that when you paint or sculpt an object over and over, you learn things about it that you could never know otherwise. You don’t just paint the tree, you know the tree.
Get acquainted with Clip Studio Paint (CSP). This versatile digital art software is reshaping the drawing landscape as a compelling Photoshop alternative. It caters to both aspiring artists and experienced professionals. Its comprehensive set of tools helps bring creative visions to life. This beginner’s guide to Clip Studio Paint will explore essential features and techniques to set you up for success as you begin your artistic journey with CSP.
This guide is designed for first-time users. Make sure to install the Clip Studio Paint app on your computer. If you’re eager to explore the software’s capabilities, let’s begin. We’ll cover topics such as setting up your workspace, mastering the basics of layers and brushes, and utilizing official resources to enhance your skills.
Before downloading the Clip Studio Paint app onto my computer, I used Photoshop for over 20 years. While I still love Photoshop’s photo editing capabilities, I use CSP almost exclusively for drawing. Now that Clip Studio Paint can be downloaded onto tablets and phones, it may eventually replace my use of Procreate. However, at the moment, I find they both have their strengths.
By the end of this guide, you’ll have a solid foundation to build upon, empowering you to unleash your creativity with confidence. Ready to jump right in and discover the limitless possibilities awaiting you in Clip Studio Paint?
Crafting Your Ideal Workspace in Clip Studio Paint
A well-organized workspace maximizes your efficiency and creative potential in Clip Studio Paint. In this section, you’ll learn to customize the user interface, organize panels and windows, and select the most valuable tools and settings for beginners. I have reset my workspace to default for the photos in this post to make following along less confusing. However, if you are a Windows or Linux user, your workspace may differ since my system is running on a Mac.
Customizing the User Interface
CSP offers a highly customizable interface, allowing you to personalize your workspace to suit your preferences and workflow. Just click and drag the panels or toolbars to rearrange the elements and move them to their desired locations. In addition, you can dock panels together or stack them in tabs for easy access.
If you wish to reset the layout, go to the main menu, click on “Window,” then select “Workspace,” and choose “Reset to default.” I, for one, love this option because I share a Wacom tablet with my son.
Organizing Panels and Windows
Effectively organizing panels and windows will help you streamline your creative process. Essential panels for beginners include: Layers, Tool Property, Color, and Navigator
How to Display a Panel
Go to the main menu
Click on “Window”
Select the panel you want to show
To close a panel, click the “x” icon in the panel’s upper-right corner. For a cleaner workspace, you can collapse or expand panels by clicking the small arrow icon next to the panel’s name.
Recommended Tools and Settings for Beginners
As a beginner, it’s helpful to familiarize yourself with CSP’s most commonly used tools. These tools include the Brush, Eraser, Selection, and Text tools. You can access these tools from the toolbar on the left side of the workspace. Additionally, make sure to set up your preferences to optimize your workflow. To do this:
Go to the main menu
Click on “File”
Select “Preferences”
Here, you can adjust settings such as canvas size, units, and undo levels. Again, remember to save your settings before exiting the Preferences window.
Unleashing Your Creativity: Mastering the Basics in Clip Studio Paint
When starting your exploration of Clip Studio Paint, it is crucial to understand the core features. Then, building on these techniques will provide a solid foundation for your creative journey. In this section, we’ll explore the fundamentals of working with layers, essential tools and brushes, and basic techniques for drawing and coloring.
Working with Layers
Layers are a crucial aspect of digital art, allowing you to create, edit, and organize different artwork elements separately. Mastering layers will help you unlock the full potential of CSP.
Understanding layers and layer types: In CSP, there are various layer types, including raster, vector, and text layers. Each type serves a different purpose and can be used for specific tasks, such as sketching, inking, or adding text. To create a new layer, click the “New Layer” button at the bottom of the Layers panel.
Organizing and managing layers: Keeping your layers organized will make your workflow more efficient. Rename layers by double-clicking their names in the Layers panel, and use folders to group related layers together. You can also change the order of layers by clicking and dragging them up or down in the panel.
Layer blending modes and opacity: Blending modes determine how a layer interacts with the layers beneath it. To achieve various effects, experiment with different blending modes, such as Multiply, Screen, or Overlay. One of my favorite modes is “Clip to Layer Below.” I often use this when adding shading. It ensures that only the part of the drawing I want shaded is affected. In addition, you can adjust the opacity of a layer by moving the Opacity slider in the Layers panel.
The differences between Pro and EX: While CSP Pro offers many features suitable for most users, CSP EX includes additional capabilities. I chose EX over Pro when I recently upgraded because Ex can create multiple-page documents, similar to Adobe InDesign’s book documents. Also, EX is better for creating comic long-form layouts used in WebToons, and lastly, it can create animations. Evaluate your needs to determine which version best suits your creative goals.
Beginners Guide to Clip Studio Paint Essential Tools and Brushes
Clip Studio Paint offers an extensive array of tools and brushes to help you create stunning artwork. First, familiarize yourself with the following essential tools that you will probably be using most often:
The Pen tool: The Pen tool is your primary drawing tool in CSP. Access it from the toolbar on the left. Experiment with the various brush presets available. You can customize brush settings in the Tool Property panel. You can also download additional brushes from the Clip Studio Assets page.
The Eraser tool: The Eraser tool, also found in the toolbar, allows you to erase parts of your artwork. Like the Brush tool, you can modify eraser settings in the Tool Property panel.
The Selection tools: Selection tools enable you to isolate specific areas of your artwork for editing. CSP offers several selection options, including the Marquee, Lasso, and Magic Wand tools. Access these tools from the toolbar and adjust their settings in the Tool Property panel.
Fill Tool (Paint Bucket tool): Use one of the selection tools to define an area, then use the Fill Tool to fill the entire area with color.
Essential Techniques for Drawing and Coloring
Mastering fundamental drawing and coloring techniques will set the stage for your artistic growth in CSP.
Sketching and inking: Start with a rough sketch using a brush or pen on a new layer. I typically draw with the G-pen which is standard, however many artists create or download pens or pencils. Once you’re satisfied with your sketch, create a new layer for inking, and use a pen tool to trace over your drawing. When finished, hide the sketch layer.
Coloring with the Fill tool: The Fill tool, located in the toolbar (looks like a paint bucket, which is how I refer to it), allows you to fill enclosed areas with color quickly. Create a new layer beneath your line art and use the Fill tool to add flat colors to your artwork.
Shading and blending techniques: Add depth to your artwork by applying shading and highlights on separate layers. Use a soft brush or the Airbrush tool to shade.
Enhancing Your Artwork: Utilizing CSP Brushes
Clip Studio Paint boasts a vast collection of brushes, enabling you to find the perfect tools to create a wide range of artistic effects. This section will discuss how you can browse, download, and manage brushes to elevate your work.
Browsing and Downloading Brushes
CSP offers a rich library of brushes, both built-in and community-created. To access additional brushes:
Visit the Clip Studio Assets website or open the Clip Studio application and click the “Assets” tab.
Use the search bar to find brushes based on specific keywords or browse through popular and recommended brushes.
Click the download button or the cloud icon on the brush’s preview image to download a brush.
Installing and Managing Brushes
Once you’ve downloaded brushes, install them in CSP to use them in your projects. Follow these steps to install and manage your brushes:
Open Clip Studio Paint and go to the “Sub Tool” panel.
Click the small wrench icon in the bottom right corner of the panel to open the “Sub Tool Detail” window.
In the “Sub Tool Detail” window, click the “Import” button and navigate to the downloaded brush file (usually a .sut or .clip file).
Select the brush file and click “Open” to install the brush in CSP.
After installing the brush, you’ll find it in the “Sub Tool” panel under the appropriate tool category (e.g., Brush, Pen, or Pencil). To keep your brushes organized, create custom sub tool groups by right-clicking on an existing group and selecting “Create New Sub Tool Group.” You can then drag and drop brushes into your new group for easy access.
As you expand your brush collection and hone your skills, you’ll discover how CSP brushes can significantly enhance your artwork and help you easily create stunning visuals.
Importing and Exporting File Formats
CSP supports various file formats, allowing you to integrate them with your existing workflow seamlessly. Some commonly used file formats include:
PSD: Adobe Photoshop’s native file format, which preserves layers and blending modes for easy editing in CSP.
PNG: A lossless image format with support for transparency, useful for sharing finished artwork or individual elements.
JPEG: A widely-used compressed image format, ideal for sharing completed artwork online.
To import a file, go to the main menu, click “File,” and select “Open.” Then, navigate to the file you want to import and click “Open.” To export your artwork, click “File” in the main menu, choose “Export (Single Layer)” or “Export (Multiple Layers),” and select the desired file format. Adjust the settings as needed and click “OK” to save your file.
Embarking on Your Creative Journey
As we conclude this beginner’s guide to Clip Studio Paint, it’s clear that this app offers a wealth of features designed to help you unleash your creativity. From setting up your workspace to mastering the fundamentals and using brushes, CSP provides an amazing platform for artists at all stages. It’s become my go to program when I want to draw Faces or Figures.
As you continue to explore Clip Studio Paint, experiment with its vast array of tools and techniques to develop your own unique style. Don’t hesitate to push your creative limits, and always remember that practice leads to mastery. The more you use CSP, the more confident and skilled you’ll become.
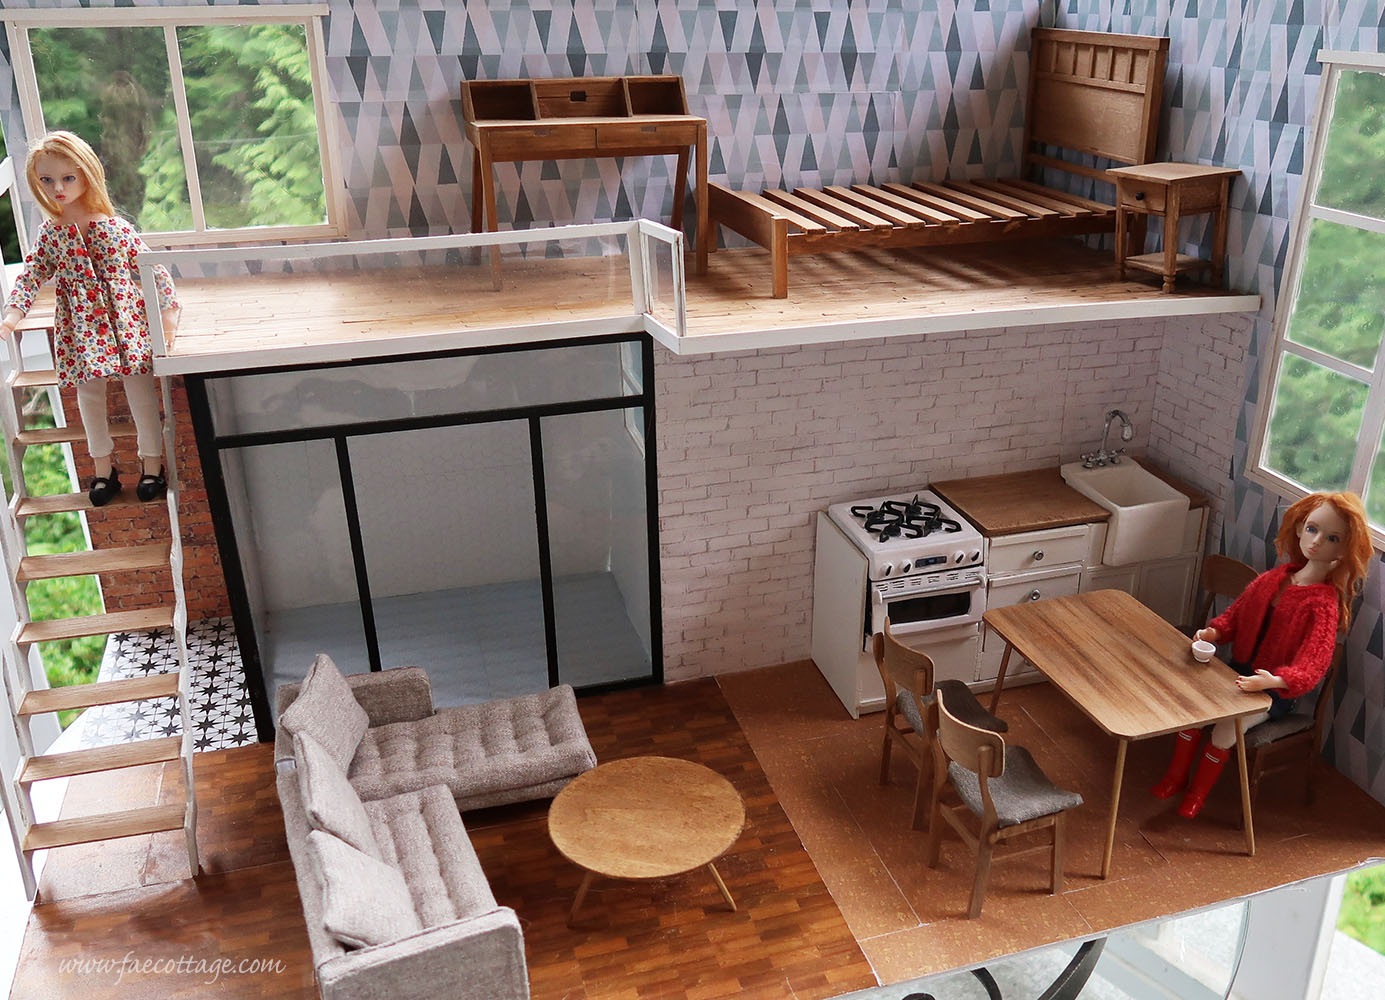
Have you seen the YouTube videos of people putting together miniature DIY house kits and dollhouse furniture from kits like the ones from Cutebee, or Robotime? I thought this would be fun to try, and maybe even a cute setting to display 7 inch dolls in.
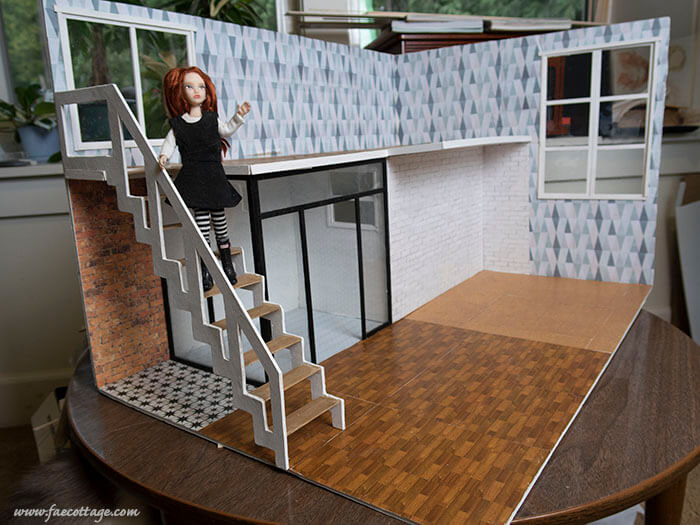
However, what I didn’t realize was that these kits are really small. Way too tiny for my dolls to live in. So I fixed that by recreating my own version of CuteBee’s Blue Times house in larger scale.
Floor Plan and Dollhouse Furniture
This isn’t a step-by-step tutorial, but in this post I’ll explain exactly how I created a larger version of the Cutebee miniature house. Also, I have created tutorials some of the dollhouse furniture, such as the night stand, the table and chairs, and the stove. They will be on my website, or intutorials in blog posts soon, I promise.
In addition, I’ve made a pattern with the dimension of all the pieces, and a supply list. You can get this right now by just signing up for my email list! (link)
How My Mom Inspired Me to Live a Creative Life
When I was a girl, I really wanted a big dollhouse. Instead, my mom helped me make one out of 2 cardboard boxes stacked one above the other. It wasn’t as nice as the amazing things I see people creating from these miniature DIY house kits in online videos today, but we had fun working on it together.
As we constructed it, she told me about the box houses she and her sister had made as girls. She grew up during the depression, and even though her dad was never out of work, not many middle class families had extra money for expensive toys.
She described how they got fabric and wallpaper samples from the Sears catalogue. These were used these to paper the walls, and for curtains and upholstery. Some of the dollhouse furniture was constructed from waste plastic food containers. My clever grandmother could make all sorts of amazing craft projects from recycled products!
There is satisfaction in making something yourself that you don’t get from buying it at the store. In addition, there’s fun in figuring out how to make something yourself.
My First Miniature DIY House Kit
When I opened my CuteBee house kit on on Christmas morning, I was a little disappointed it was so small! It did say 1/24th on the box though. Also, the dollhouse furniture was rather cheaply and factory made. Not the nicest quality.
So I put it on the shelf in my craft room. However, I kept thinking about what a lovely setting it would make my dolls, if only it was bigger. My 6-7 inch dolls would have loved living there.
How I Copied the Tiny House and Made It Bigger
So last month, I decided to make a bigger house, and use the Blue Times house as a pattern. But since most of my hand made dolls aren’t to scale, first I had to figure out just how big to make the tiny house.
Also, since I wanted my little house to look just like the one in the picture, I had to figure out how to copy the wall paper.
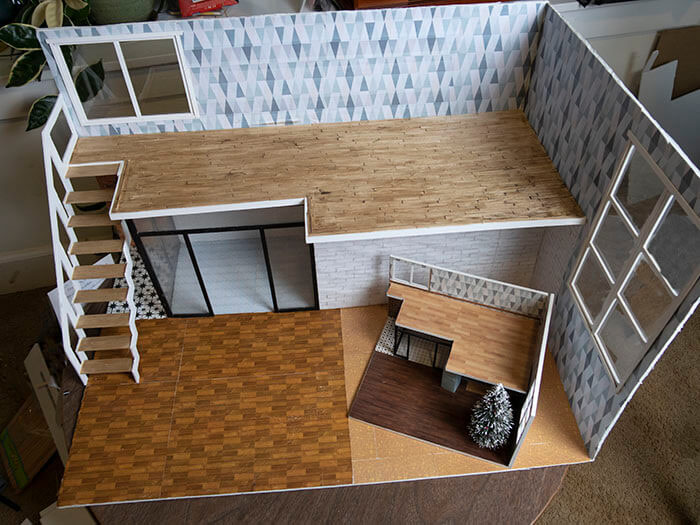
The house in the kit is made out of very thin wood, but I decided to make mine from foam board instead. I used one full sheet of foam board for the back and another for the floor, that way I only needed to cut the pieces for the side wall and the top floor. The walls were glued together with PVA glue that I purchased online
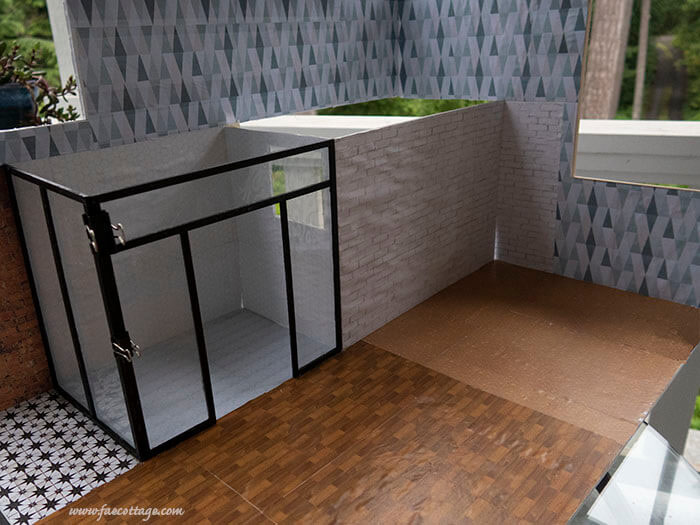
In addition, I purchased some wood stripes at the hardwood store to make the frames around the windows. Before gluing them in, I painted them with white acrylic paint. For the “glass” I used plastic cut from the lids of large lettuce containers. (I don’t recommend doing this though. You can buy clear plastic in a craft store that’s much nicer.)
On to the Walls And Flooring
The wall paper was a little tricky. First I tried scanning the paper that came with my Cutebee kit. I scanned it into Photoshop, and spent a couple of hours trying to get the small
Instead of scanning the flooring from the Cutebee dollhouse, I looked at flooring online, and made screenshots of some images. I decided to use printed cork for the kitchen floor, and wooden flooring for the living room.
I copied a tile pattern for the bathroom and edited it in Photoshop. and the small tiles cut and pasted into larger sections to print. At the craft store, I bought several sheets of scrapbook paper for the brick walls, and the
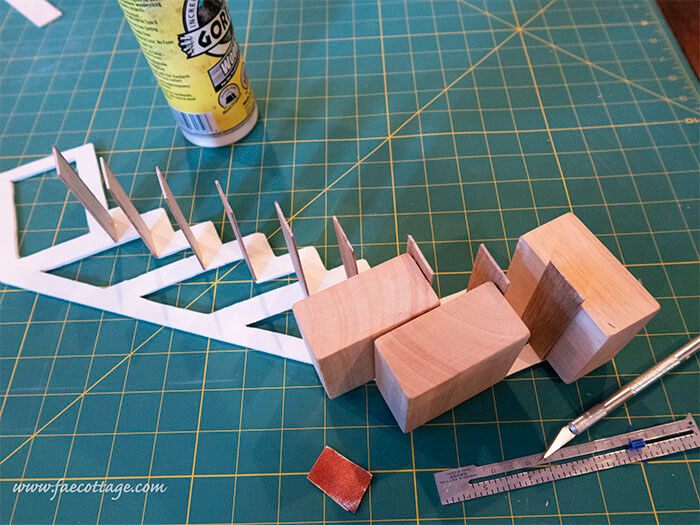
For the upstairs floor, I tried something different. I found some craft sticks at the hobby story, and thought it would be a good chance to try cutting something simple on my husbands scroll saw, although these could have also have been cut with a craft knife.
However, the electric saw saved my hands! I think I cut over 100 pieces. And also gave it gave me confidence in using the scroll saw for more difficult projects in the future.
Cutting a Staircase that Actually Fits the House
Last Christmas when my husband and son asked what I wanted, to asked for one of the miniature DIY house kits. The one I choose was from CuteBee. It was called Blue Times, number L-023.
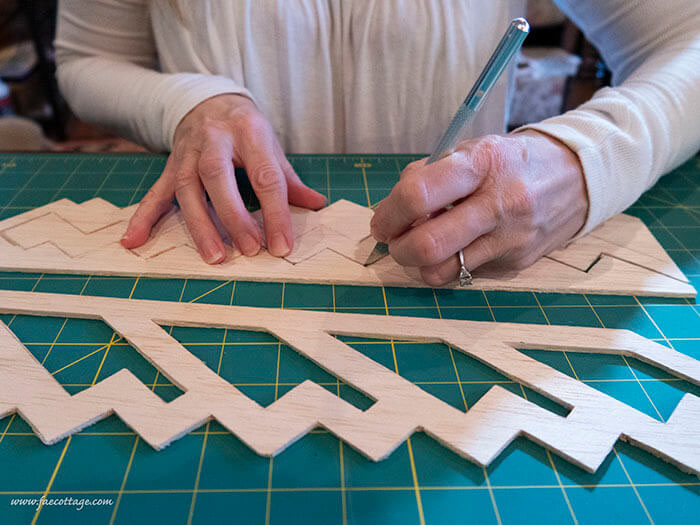
So far, the most difficult part in enlarging my Cutebee miniature DIY house kit has been figuring out the staircase so that it fit. So do this, I measure the diagonal from the top of the staircase to the floor. I traced the Cutebee stair railing, scanned it, and enlarged by 2.5. Lucky guess! It fit perfectly when I printed out the pattern and taped it together.
Back to the hardware store, where I purchased to sheets of base wood. Base wood is a really soft wood that is easy to cut with an x-acto blade. But it also is quite fragile and wants to separate if you put too much pressure on it when cutting.
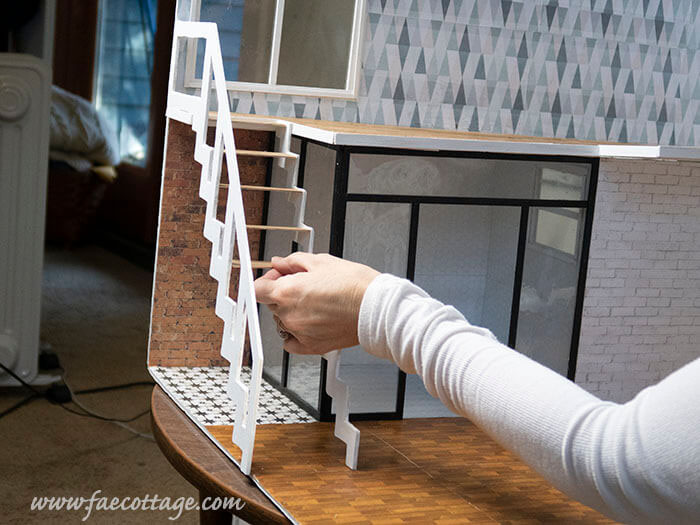
It took 2 days to cut and 2 coats of paint, but my stair railing is ready to go into the house. I first glued all the steps in place.
What’s Left to Finish on my Miniature DIY house
The stairs are now in, I started the upper floor, and glued some extra railings around the top edges. But I’m far from finished.
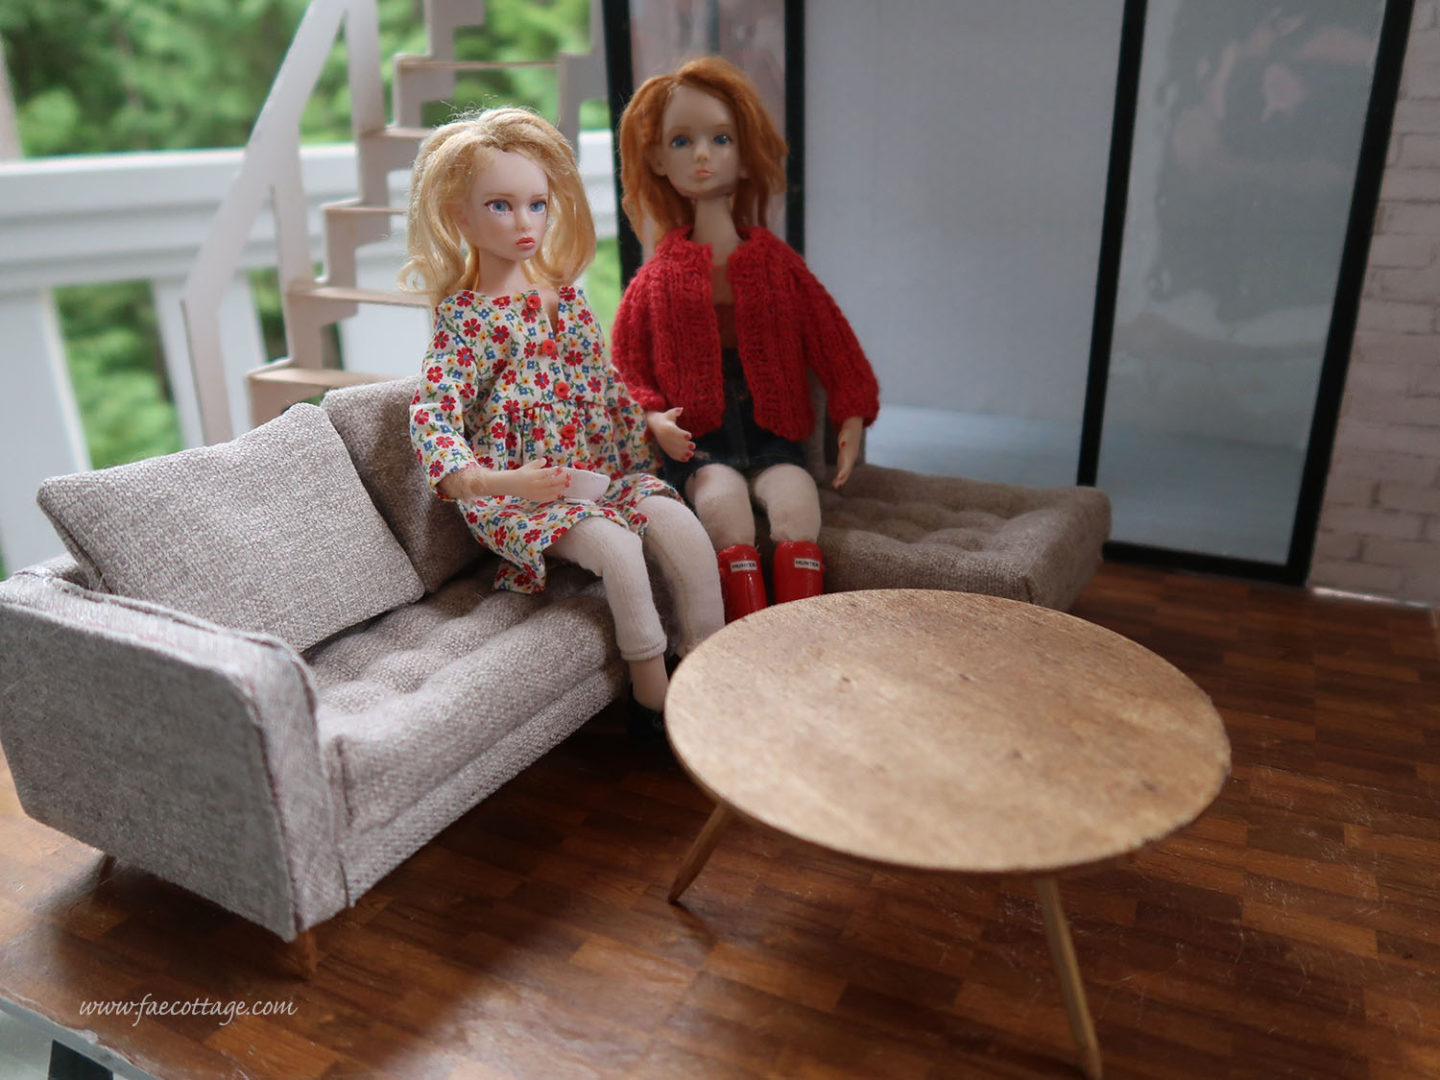
For the kitchen counter, I plan to use more of the base wood I used fir the stairs, and follow a tutorial I found on YouTube. I also found a tutorial from a different artist for a mid-century style sofa. And another great tutorial for making a bed.
A lot of the objects I plan to make from polymer clay, which I’m also using to create dishes for my larger dolls.
The lighting is still undecided. It’s probably not too late to run wires up the back to add some electric lighting to the house, but I can probably also find battery operated lights at Hobby Lobby.
Why Not Try Making Your Own Miniature DIY House?
Whether you purchase a kit from Cutebee, Robotime, or others, or do as I did, and create your own inspired by these kits in whatever size you choose, making a miniuture house is a lot of fun! And it’s easier than you think. Even the stairs! You can start off by watching some of the miniature DIY house videos online for inspiration.
Here are the steps I took to create my house:
Trace out the kit pieces and scan onto your computer. You can use a software like Photoshop to enlarge your pattern.
Gather your materials. You will need foam board, a cutting tool, a ruler, glue.
Start with the flooring and wall paper. You can either use scrapbook papers from the craft store, wood craft sticks, or create your own on your computer. (Many libraries allow you to send print jobs to their color printers, and then pick up your pages.)
To create the windows, use thin sheets of plastic. You can use lids from plastic containers, the clear plastic in report covers, or a heavier plastic. I framed out my windows, and then glued the plastic on the back side.
I’ll be making a second house soon, however, I think I’ll create my own floor plan next time. Perhaps if anyone is interested, I’ll create a pattern and step by step instructions. But before I start that next house, I have some more dollhouse furniture to finish!
Recently I have begun receiving many questions about Procreate. As a result, I decided to write this post as a sort of Procreate tips for beginners guide. Often we are told when we are attending a webinar or training, “Don’t be afraid to ask questions!” or “There are no stupid questions!” nevertheless, many of us don’t raise our hand and ask.
First of all, Procreate is a drawing app that was developed in 2011. For over 10 years, it’s ranked in the top 10 on Apple’s app store for most downloads. This app allows you to draw, paint, and even create animations using an Apple pencil or even your finger along with an IOS tablet or phone. Recently they added 3D!
Procreate costs only $12.99. This is an excellent bargain if you compare it to the monthly subscription for Photoshop, and especially if you already own an iPad. Also, if you are not sure whether digital drawing is for you, it is significantly cheaper than Clip Studio Paint and is a one time purchase.
These are the 3 things you need to get started:
an iPad
Apple pencil generation 1 or 2
Procreate app
And a couple of additions I find helpful:
A screen protector (I use one called Paperlike. It makes drawing feel a little more like drawing on paper instead of glass)
A sleeve for my pencil. Apple pencils are the size of a standard pencil and have a very smooth finish. As a result, I find my fingers start going numb after a long drawing session. Whereas when I draw with my Wacom pencil, I don’t have this problem. A sleeve helps alleviate this problem somewhat.
Apple pencils now come in versions Generation 1 and Generation 2. Note: If you are purchasing an Apple pencil, make sure to check which versions of iPad it is compatible with. The main difference between them is Generation 2 pencils can charge wirelessly, while Generation 1, like I have, needs plugging in to charge.
How to Charge Your Generation 1 Pencil
There are 2 ways to charge your Generation 1 pencil:
Remove the cap and insert your pencil into a phone or tablet power socket.
Use the adapter that came with your pencil. Connect it to your phone cord and plug it into an outlet.
Swipe left to right on your iPad screen. This brings up a side menu showing your charge level.
Procreate Tips for Beginners Guide to Basic Tools
In this post, I will only review the most basic features as though you have never opened the program. However, many of you probably have been drawing on Procreate for a while. I tried to arrange the remainder of this article in a format that makes it easy to quickly find the tool description you are looking for.
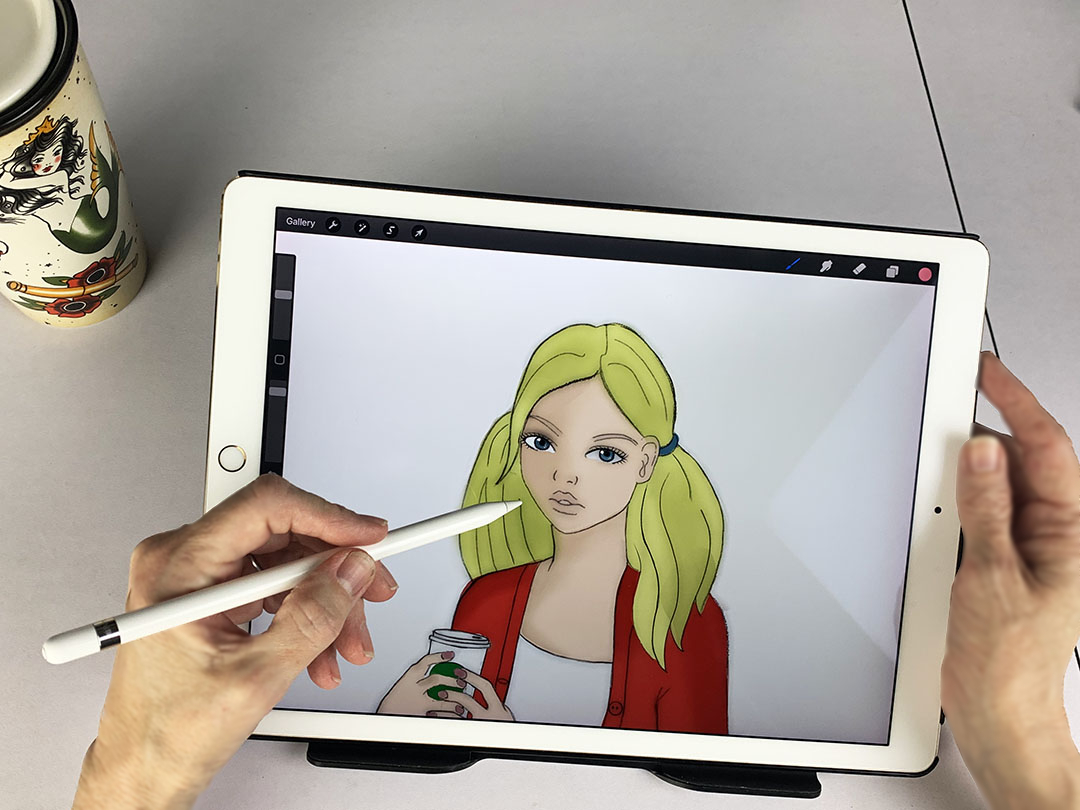
If you just downloaded the app, look for an icon like the one below. Then follow along step-by-step through this Procreate beginner guide. You’ll soon be creating, opening, and saving your documents quickly. Best of all, you’ll soon be drawing!
Procreate Tips for Beginners Guide Basics to Start Learning Now
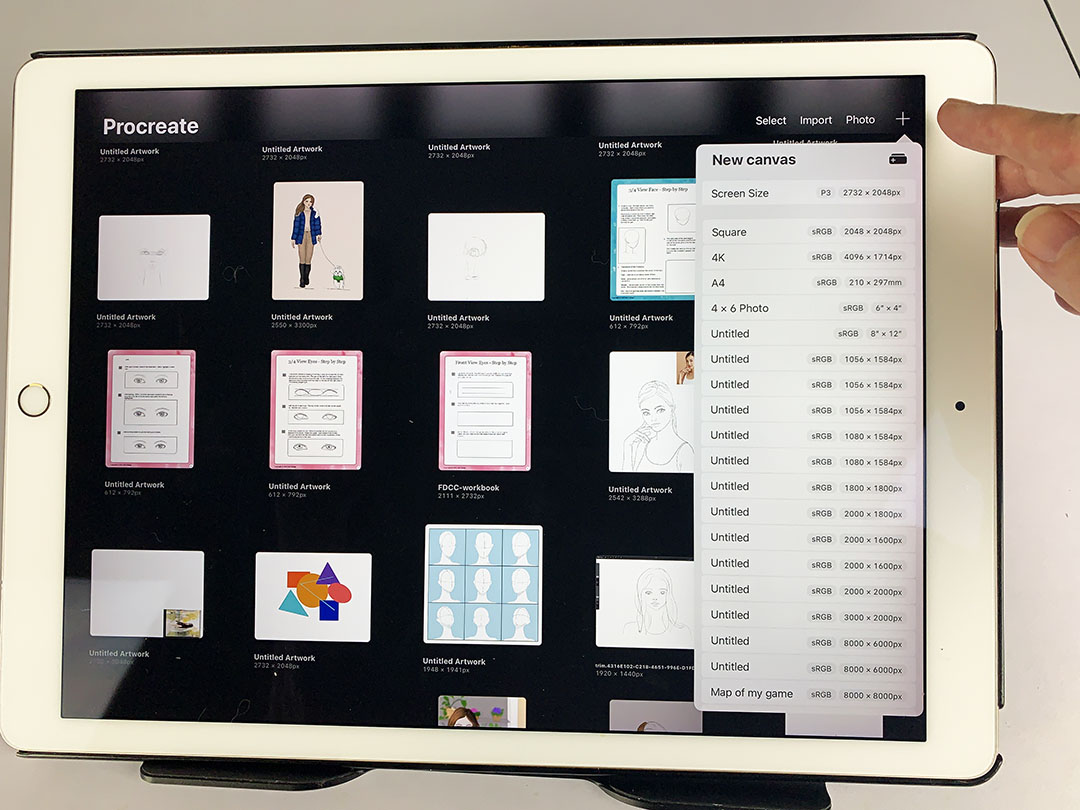
Open a document – tap the + in the upper right menu and select your document size. I usually opt for Screen Size.
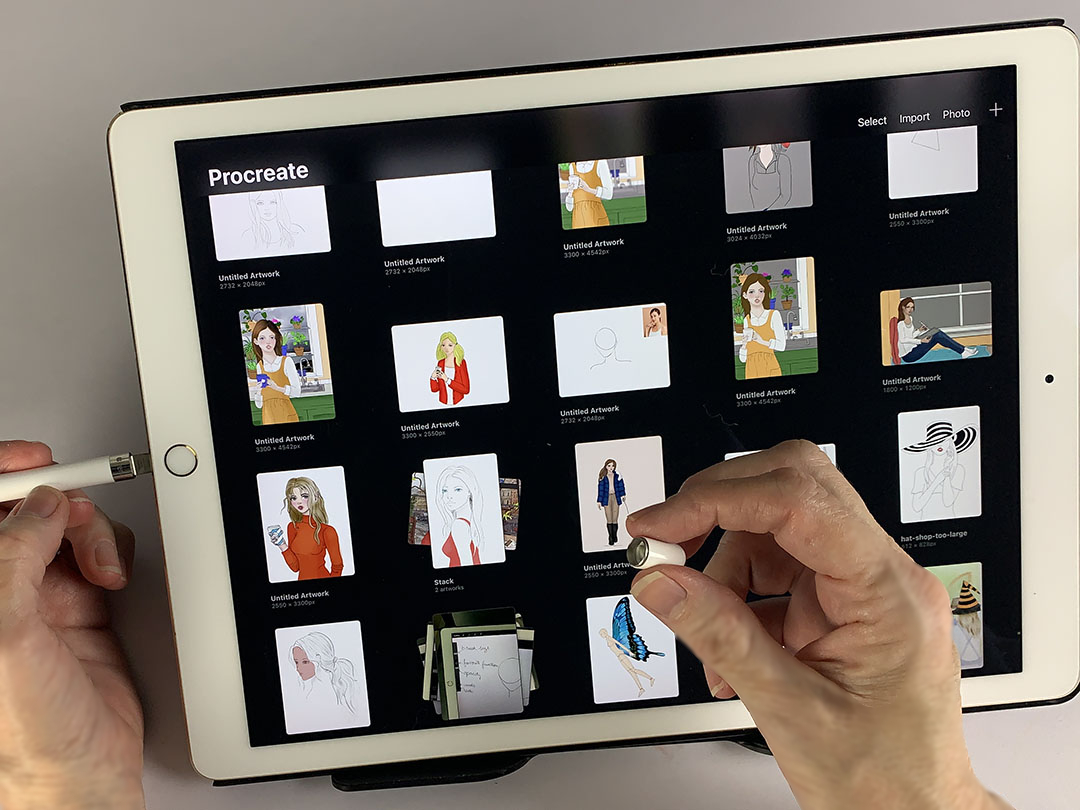
Close a document – tap the word Gallery in the upper left menu. (This also automatically saves.)
Saving – when you press the word Gallery, your document automatically saves. Here’s another way to save: open the Actions menu, choose Share from the top menu, and pick a file type. A window pops open. On the lower part of the window are options to Save Image or Save to Files.
Renaming a Document – open the document in Gallery view. Tap the title below the image, and type in the new name.
Procreate Beginner Guide to Using the Side Bar
You can move the side bar to either side, which makes it more convenient if you are left handed.
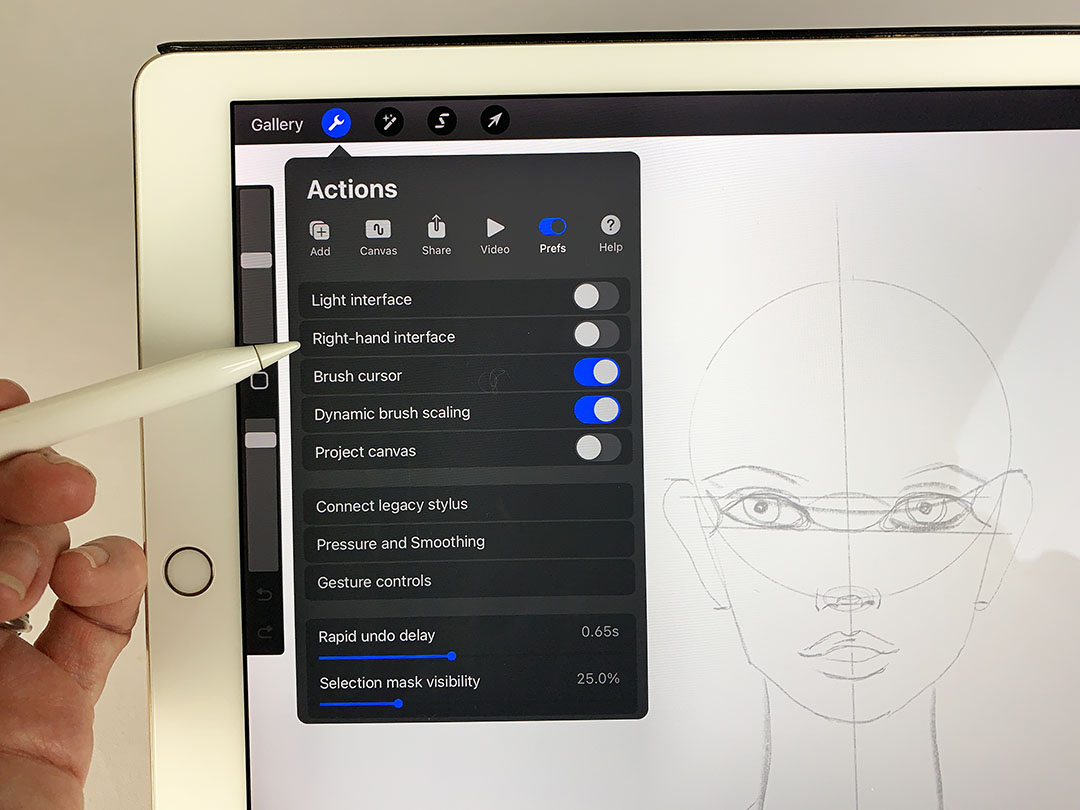
To do this, tap on the icon in the top left menu that looks like a wrench. (You need to have a document open to see this menu.) This opens the Actions menu. Next, click on the Prefs button in the horizontal menu at the top. After this, choose whether to turn the Right-hand interface on or off. If it is clicked on, the side menu appears on the right. Whereas, if you click off, the side menu appears on the left.
The side bar menu has scroll bars to adjust brush size and opacity, do and undo arrows are at the bottem. Also there is a square button that brings up a menu of frequently used actions.
Brush size – top scroll bar
Opacity – bottom scroll bar
Do and Undo – arrow at the bottom
Square icon – set frequent actions
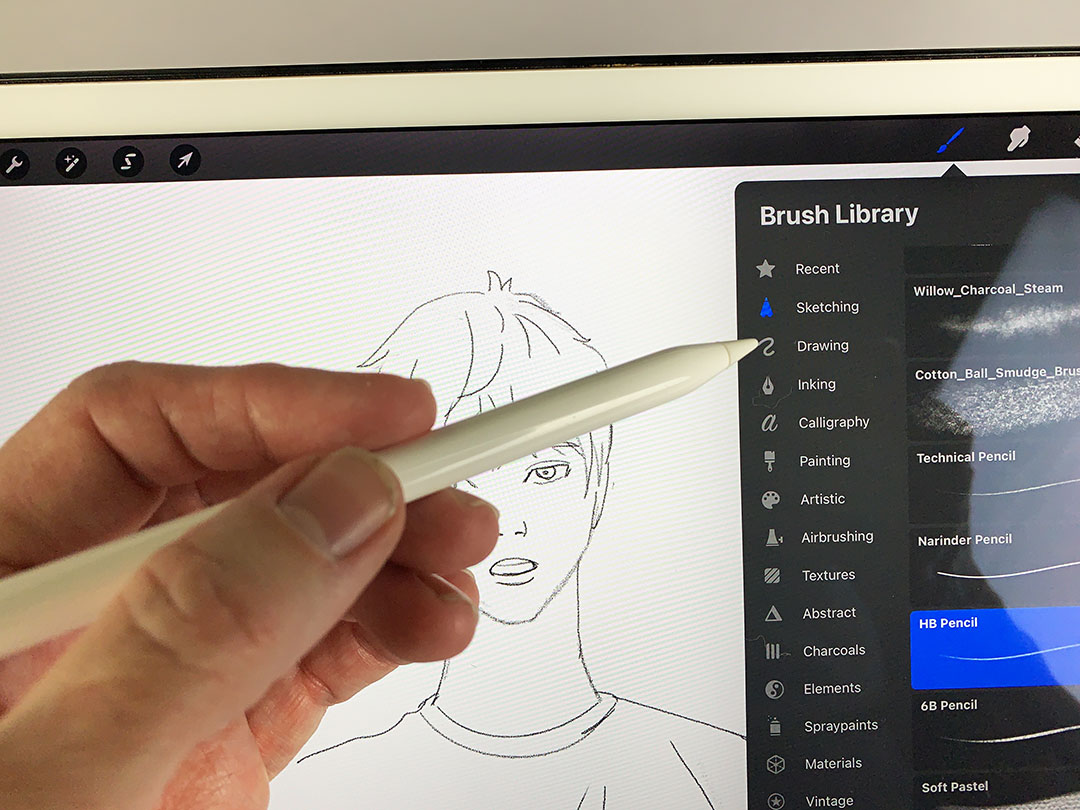
How to Choose a Brush
Click the brush icon in the top right menu. This brings up the brush library. The list of brush types is on the left, and specific brushes in that category are on the right. Procreate has a wide selection of brushes. In addition, both Gumroad and Etsy sell brushes.
My favorite standard brushes are from the Sketching Section. I like using the HB Pencil and the Procreate pencil to start my drawings.
This same library is also available when you click either the smudge or erase tool. The smudge tool smears or softens your lines. It is to the right of the brushes tool. And the erase tool is to its right. So depending on the brush you choose, you can erase completely or erase it more artistically.
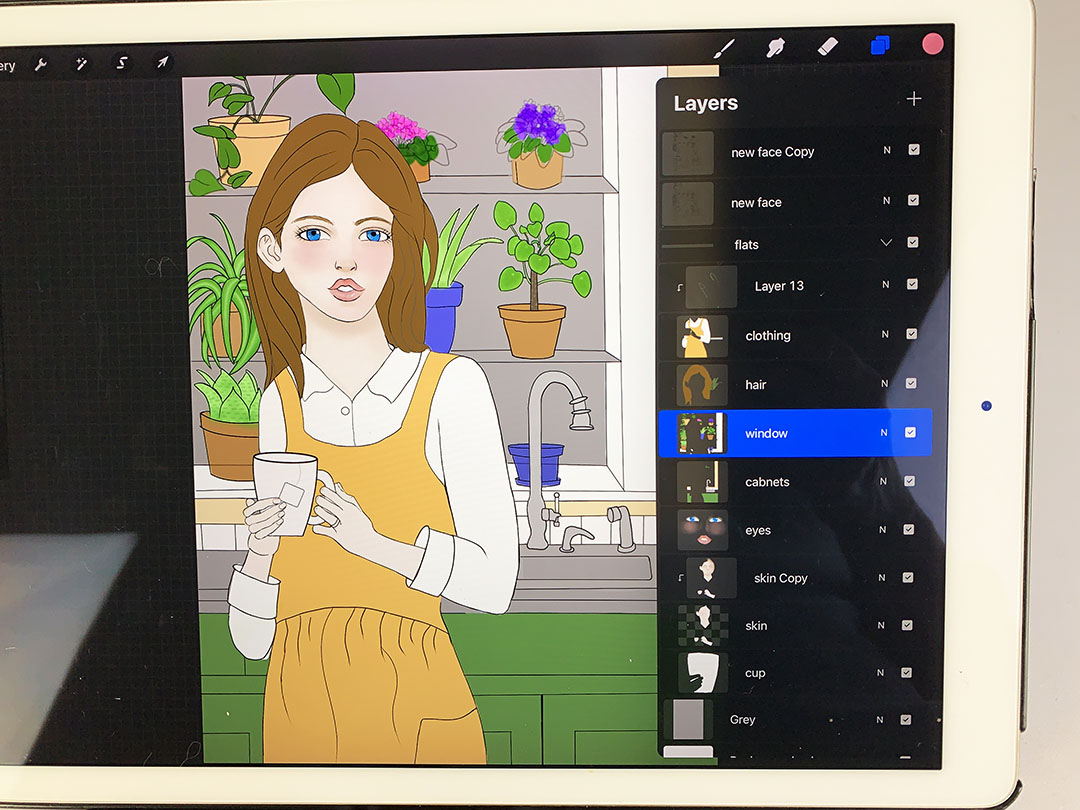
Procreate Tips for Beginners Guide to Working with Layers
The last icon in the top right menu is the layer icon. It looks like stacked papers.
To add a layer, click the +
By tapping the N on any layer you bring up a drop down menu of advanced features. I like to adjust the opacity of a layer here by dragging the bar at the top of this menu to the right.
By double tapping on the highlighted layer, you open another menu that appears on the left and offers common functions such as select, copy, paste, etc.
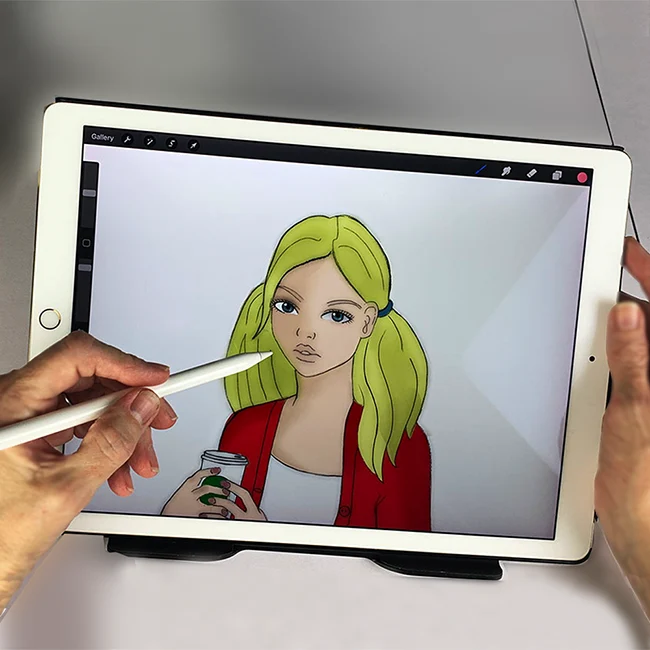
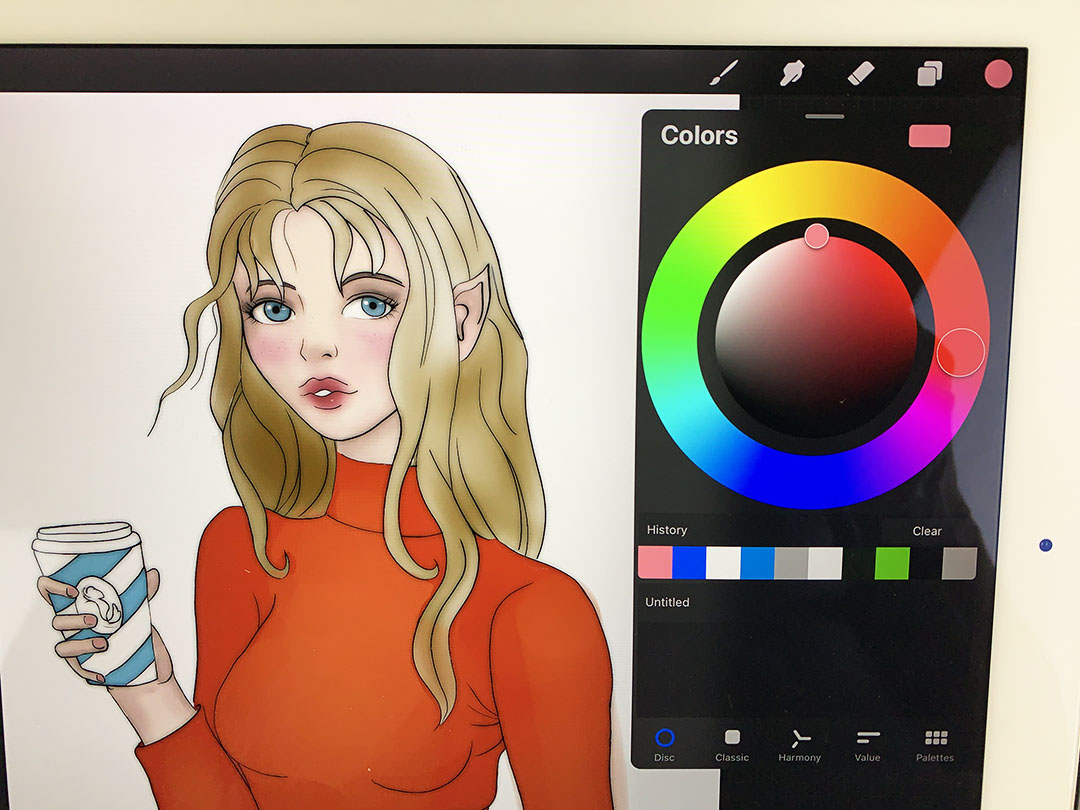
Procreate Apple Pencil Tips to Change the Color of Your Pencil
Notice the circle in the top right corner of your document. It most likely will be black. When you click it, a colored disk comes up.
You can also select colors in other formats such as:
Classic
Harmony
Value
Or create your own Pallets with the last option. All of these choices display across the bottom of the menu. If you want to enter a hex color, choose Value.
Troubleshooting When Your Stylus Won’t Draw
Once in a while, I start drawing on my iPad and nothing happens. Almost always it’s something simple. For example, I accidentally changed the color of my ink to white, or my pen isn’t charged. Here is a list of some things to check before you ask a teenager for help, and possibly end up feeling foolish like I sometimes do.
Check that your brush tool is activated, and not the eraser. (The icon in the top right menu should be blue.)
What color is the circle at top right? Make sure it’s not white.
Is the opacity lowered?
Make sure your pen is charged.
Check your Bluetooth connection to make sure it is on.
However if none of these suggestions work, take the cap off your pen and insert it into to charging socket. If it’s still not working, ask a teenager or someone on a forum for help.
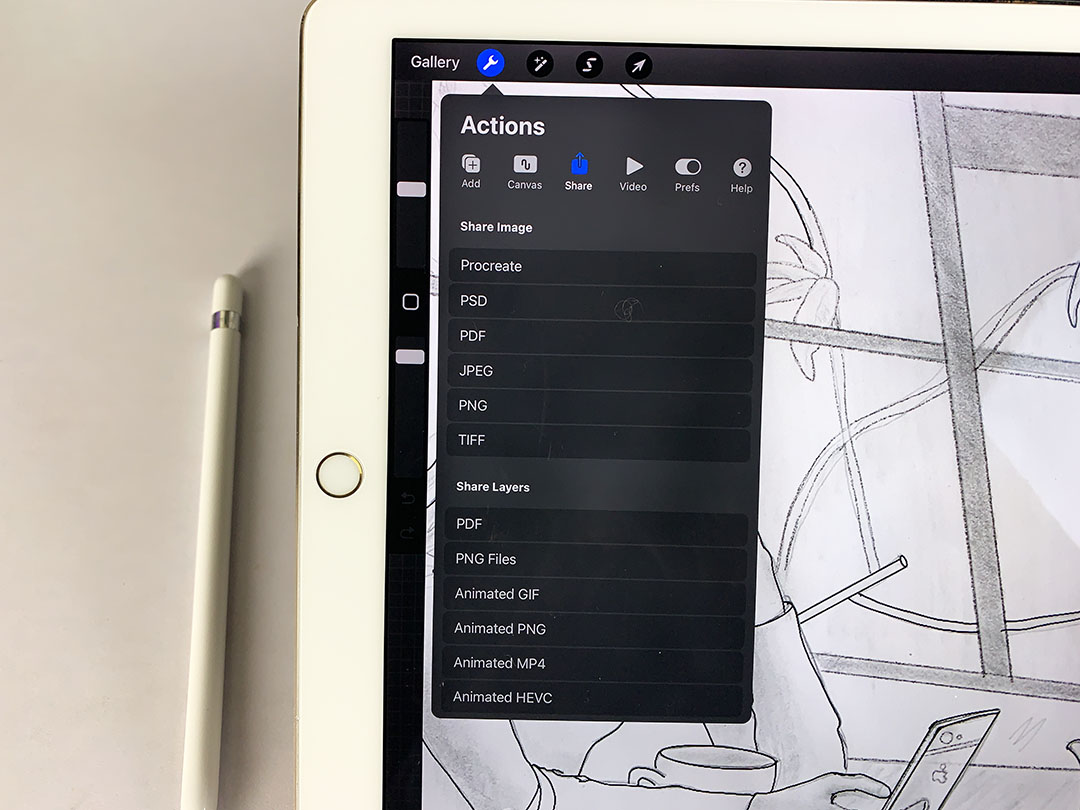
Now Share Your Work
Whether you want to transfer your drawing to a computer or email it to someone, sharing files is easy! Procreate allows files to be exported in these types: Procreate, PSD, PDF, JPEG, PNG and TIFF. JPEG and PDF are by far the most popular.
Firstly, bring up the Actions menu (wrench icon)
Next, select Share from the top menu.
Finally, choose your preferred file type.
Procreate then asks how you want to share. I most often use AirDrop if sending to another Apple device. Otherwise, I attach in an email. You can also share your artwork directly on social media from the Actions menu. This menu also allows copying, printing, or saving into a file on your iPad
Where to Find More Help When You Need It
If you are looking for more Procreate tips for beginners that cover some different functions, I suggest checking out A Basic Beginner’s Guide to Procreate after you finish this article.
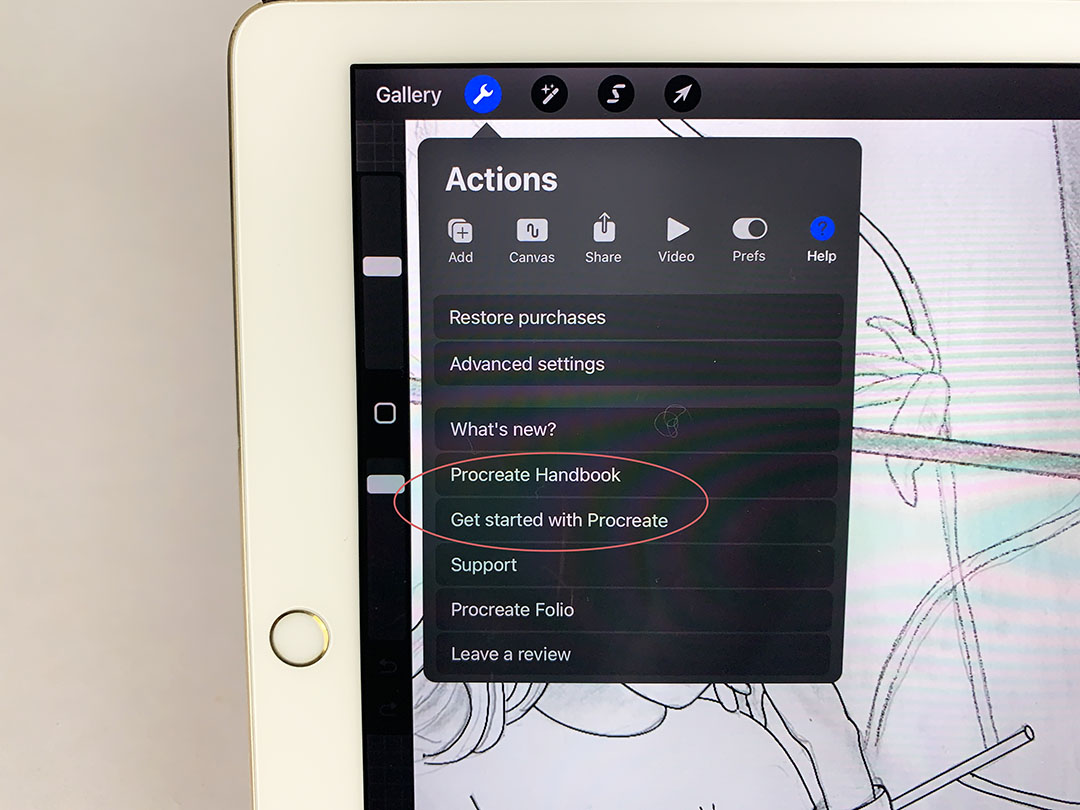
Procreate provides an excellent tool right in the app to learn more and will be the most updated. There is no help button in the top menu. In Procreate, the help button hides in the Actions menu. Remember, it’s that button in the top left menu looks like a wrench. Help is on the top horizontal menu at the far right.
When you click it, another menu comes up. My favorite selection on this menu is Procreate Handbook. Clicking this takes you to a searchable off-site webpage where you can either type in what you need help with or search by category.
Also, another option on the Help menu that is worth having a look at is just below the Procreate Handbook, and it is called Get Started with Procreate.
Drawing on the Go
Procreate became the first major drawing app to take with you on your iPad over a decade ago. It has now been joined by Clip Studio Paint, and the less popular Adobe Fresco. So if you love getting out of your house for a bit and drawing in the park or sitting in a cafe sipping your latte while sketching your surroundings, consider giving Procreate a try.
Also, transferring your drawings between programs is easy because you can save your files in various formats. I oftened start my drawing in Procreate and then airdroped it to my computer. Later, I continue my sketch in Clip Studio Paint on my larger Wacom screen. However, now that I can use Clip Studio Paint on my iPad, I do most of my drawings there.
Final Thoughts on the Procreate App
In conclusion, Procreate is an excellent tool for artists of all levels. With its many features, Procreate can seem overwhelming for beginners, so I hope this Procreate tips for beginners article has helped you. I enjoyed using Procreate on my iPad for several years. But often I wanted to continue working on my drawing on my Wacom tablet where I can use a more comfortable and fatter stylus. So when Clip Studio Paint developed an app, I quickly switched as it just makes things easier. Also, Clip Studio Paint is a more rebust program that even rivals Photoshop and allows me to pose figures for reference.
However, if you are just starting out exploring digital drawing, Procreate is a great option without having to get a yearly subscription. With these tips, you should now understand what you need to get started. Remember that practice makes perfect.
The more you use Procreate, the more comfortable you’ll become with it. These tips will make drawing on Procreate surprisingly easy and fun. Happy drawing!